Why You’ll Love This Recipe
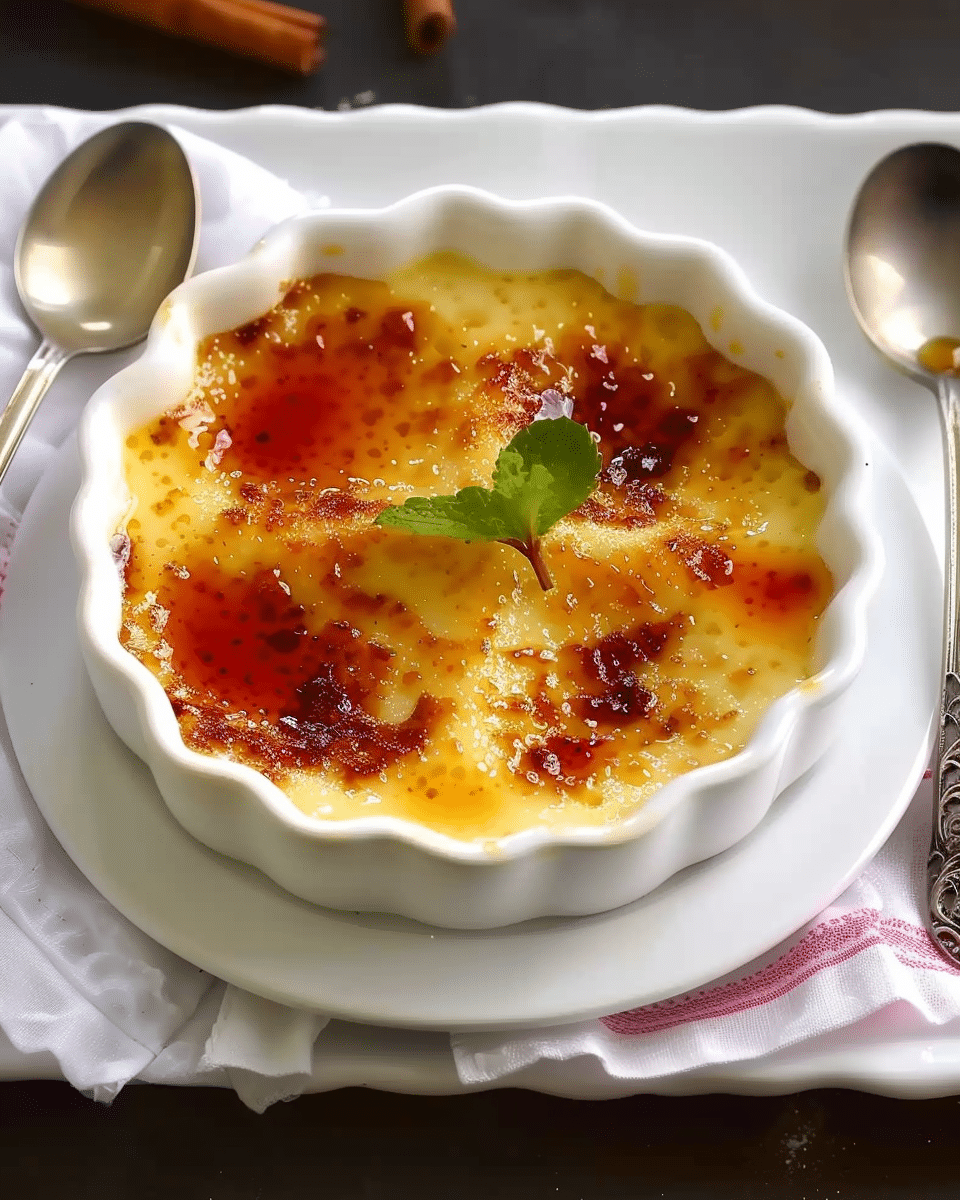
Crème brûlée is a timeless dessert that’s as simple as it is decadent. The smooth vanilla custard is balanced beautifully by the crispy, caramelized sugar crust, creating a contrast of textures and flavors with each bite. While it’s often associated with fine dining and restaurants, it’s surprisingly easy to make at home with just a few ingredients. The vanilla adds depth and warmth to the custard, and the gentle brûlée process gives you that perfect sweet crunch on top. If you love rich and creamy desserts, this French classic is a must-try!
Ingredients
- 2 cups heavy cream
- 1 vanilla bean (or 1 tablespoon pure vanilla extract)
- 5 large egg yolks
- 1/2 cup granulated sugar (plus extra for the topping)
- 1/4 teaspoon salt
- 1 teaspoon pure vanilla extract (if not using vanilla bean)
(Tip: You’ll find the full list of ingredients and measurements in the recipe card below.)
Directions
- Preheat the Oven: Preheat your oven to 325°F (163°C). Prepare 4-6 ramekins (depending on size) by placing them in a large baking dish.
- Infuse the Cream: In a medium saucepan, heat the heavy cream over medium heat. Split the vanilla bean in half and scrape the seeds into the cream. Add the vanilla bean pod as well (or add vanilla extract if using). Stir occasionally until the cream is just about to simmer (but not boiling). Remove from heat and let the vanilla infuse in the cream for 10 minutes. If using vanilla extract, add it after removing the cream from heat.
- Mix the Egg Yolks and Sugar: In a mixing bowl, whisk together the egg yolks, granulated sugar, and salt until the mixture is pale and smooth.
- Temper the Eggs: Slowly pour the warm vanilla-infused cream into the egg mixture while continuously whisking to prevent the eggs from curdling. Do this slowly and in small amounts to gradually raise the temperature of the eggs.
- Strain the Mixture: After all the cream is incorporated, strain the custard mixture through a fine-mesh sieve to remove any curdled bits of egg or vanilla bean pod. This step ensures a silky-smooth custard.
- Bake the Crème Brûlée: Pour the custard mixture evenly into the prepared ramekins. Place the ramekins in a large baking dish and fill the dish with hot water until it reaches halfway up the sides of the ramekins (creating a water bath, or bain-marie, for even cooking). Bake for 45-50 minutes, or until the custard is set around the edges but still slightly wobbly in the center. The custard should be firm but still jiggle slightly when you move the ramekin.
- Cool and Refrigerate: Remove the ramekins from the water bath and allow them to cool to room temperature. Once cooled, cover with plastic wrap and refrigerate for at least 2 hours, or overnight if you prefer.
- Caramelize the Sugar: Before serving, sprinkle a thin, even layer of granulated sugar on top of each custard. Using a kitchen torch, gently caramelize the sugar until it forms a golden-brown, crispy crust. If you don’t have a kitchen torch, you can place the ramekins under a broiler for 2-3 minutes, watching carefully to prevent burning.
- Serve and Enjoy: Let the crème brûlée cool for a minute to allow the sugar to harden, then serve and enjoy!
Servings and Timing
- Servings: Makes 4-6 servings
- Prep Time: 20 minutes
- Cook Time: 50 minutes
- Total Time: 1 hour 10 minutes (plus cooling time)
Variations
- Flavored Crème Brûlée: Try adding other flavorings like orange zest, coffee, or even a splash of liqueur (e.g., Grand Marnier, Chambord) to the custard mixture for a unique twist.
- Coconut Crème Brûlée: Substitute half of the cream with coconut milk for a tropical flair.
- Chocolate Crème Brûlée: Stir in melted chocolate into the custard for a decadent chocolate version of this classic dessert.
- Spices: Add cinnamon, cardamom, or nutmeg to the custard for an extra layer of flavor.
- Caramelized Nuts: Top the brûlée with finely chopped caramelized nuts like almonds or pistachios for a crunchy texture.
Storage/Reheating
Crème brûlée is best served fresh, but you can store it in the refrigerator, covered with plastic wrap, for up to 2-3 days. Once topped with the sugar, it’s best to caramelize it just before serving, as the sugar crust will lose its crispness over time.
FAQs
1. Can I make crème brûlée without a kitchen torch?
Yes, you can use the broiler in your oven as an alternative. Place the ramekins under the broiler on a baking sheet for 2-3 minutes, watching closely to ensure the sugar doesn’t burn.
2. Can I make crème brûlée without vanilla bean?
Yes! You can substitute vanilla extract for the vanilla bean. Just add 1 tablespoon of pure vanilla extract to the cream after it has been heated and removed from the stove.
3. How do I know when the custard is done baking?
The custard is done when the edges are set but the center is still slightly wobbly. You can also check by gently shaking the ramekin – if the custard jiggles uniformly, it’s done.
4. Can I make crème brûlée ahead of time?
Yes, crème brûlée can be made ahead of time. Prepare and bake the custard the day before and refrigerate it. Add the sugar topping and caramelize just before serving for the best result.
5. How do I prevent the custard from curdling?
To prevent curdling, make sure to temper the eggs by slowly adding the hot cream to the egg mixture while whisking continuously. Also, don’t heat the custard mixture to a boil.
6. Can I use a different kind of sugar for the topping?
While granulated sugar is the traditional choice for the topping, you can use brown sugar for a deeper, molasses-like flavor. Just be aware that it may caramelize a bit differently.
7. How do I store crème brûlée?
Store the cooled crème brûlée in the refrigerator, covered, for up to 2-3 days. Remember to add the sugar topping and caramelize it right before serving for the best texture.
8. Can I freeze crème brûlée?
While crème brûlée is best enjoyed fresh, you can freeze the custard without the sugar topping. When ready to serve, thaw in the refrigerator and then caramelize the sugar just before serving.
9. Can I use a larger pan for baking the crème brûlée?
You can use a larger pan, but adjust the baking time accordingly. Larger custards will require more time in the oven to set, so keep an eye on them and check for the wobbly center.
10. Can I add fruit to the crème brûlée?
Yes, you can add a layer of fresh berries (like raspberries or strawberries) on top of the custard before caramelizing the sugar. This adds a lovely fresh contrast to the rich custard.
Conclusion
French Crème Brûlée with Vanilla is a truly luxurious dessert that’s surprisingly easy to make at home. With its rich, velvety custard and the signature crispy, caramelized sugar topping, it’s a show-stopping dessert that will leave everyone impressed. Whether you’re celebrating a special occasion or simply treating yourself to something indulgent, this classic French dessert is sure to be a hit. Enjoy every creamy, crispy bite of this decadent treat!
Print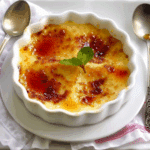
French Crème Brûlée with Vanilla
- Total Time: 30 minutes
- Yield: 12-15 mini apple pie bites
- Diet: Vegetarian
Description
Mini Apple Pie Bites with Puff Pastry are bite-sized, delicious treats made with flaky puff pastry and filled with sweet, cinnamon-spiced apples. These mini pies offer all the comfort of traditional apple pie in a portable, easy-to-serve form.
Ingredients
- 1 sheet of puff pastry (store-bought, thawed)
- 2 medium apples (such as Granny Smith or Honeycrisp), peeled, cored, and diced
- 2 tablespoons butter
- 1/4 cup brown sugar
- 1/2 teaspoon cinnamon
- 1/4 teaspoon nutmeg (optional)
- 1 tablespoon lemon juice
- 1 teaspoon vanilla extract
- 1 egg (for egg wash)
- 1 tablespoon sugar (for sprinkling)
Instructions
Prepare the Apple Filling: In a medium saucepan, melt the butter over medium heat. Add the diced apples and cook for 5-7 minutes, stirring occasionally, until the apples soften. Stir in the brown sugar, cinnamon, nutmeg (if using), lemon juice, and vanilla extract. Cook for an additional 3-4 minutes until the mixture thickens slightly. Remove from heat and let it cool.
- Preheat the Oven: Preheat your oven to 375°F (190°C). Line a baking sheet with parchment paper.
- Prepare the Puff Pastry: Unroll the thawed puff pastry sheet on a lightly floured surface. Cut the pastry into small squares or rectangles, about 3×3 inches or to your preferred size.
- Assemble the Bites: Place a small spoonful of the apple filling in the center of each puff pastry square. Fold the corners over the filling to form a parcel or triangle shape (or leave them open). Pinch the edges to seal them.
- Egg Wash: Beat the egg and brush it over the top of each pastry bite to give them a golden finish when baked.
- Sprinkle with Sugar: Sprinkle a little sugar over the top for extra sweetness and a nice crunch.
- Bake: Place the mini pies on the prepared baking sheet and bake for 15-20 minutes, or until the puff pastry is golden brown and flaky.
- Serve: Let the bites cool slightly before serving. Serve warm and enjoy!
Notes
- For extra indulgence, drizzle caramel sauce over the top or mix it into the apple filling.
- Top with fresh berries or whipped cream for a fruity, creamy contrast.
- These mini pies can be stored for up to 2 days at room temperature or 4 days in the refrigerator.
- Prep Time: 10 minutes
- Cook Time: 20 minutes
- Category: Dessert
- Method: Baked
- Cuisine: American
Nutrition
- Serving Size: 1 mini pie
- Calories: 150
- Sugar: 18g
- Sodium: 25mg
- Fat: 7g
- Saturated Fat: 3g
- Unsaturated Fat: 4g
- Trans Fat: 0g
- Carbohydrates: 21g
- Fiber: 2g
- Protein: 1g
- Cholesterol: 30mg


