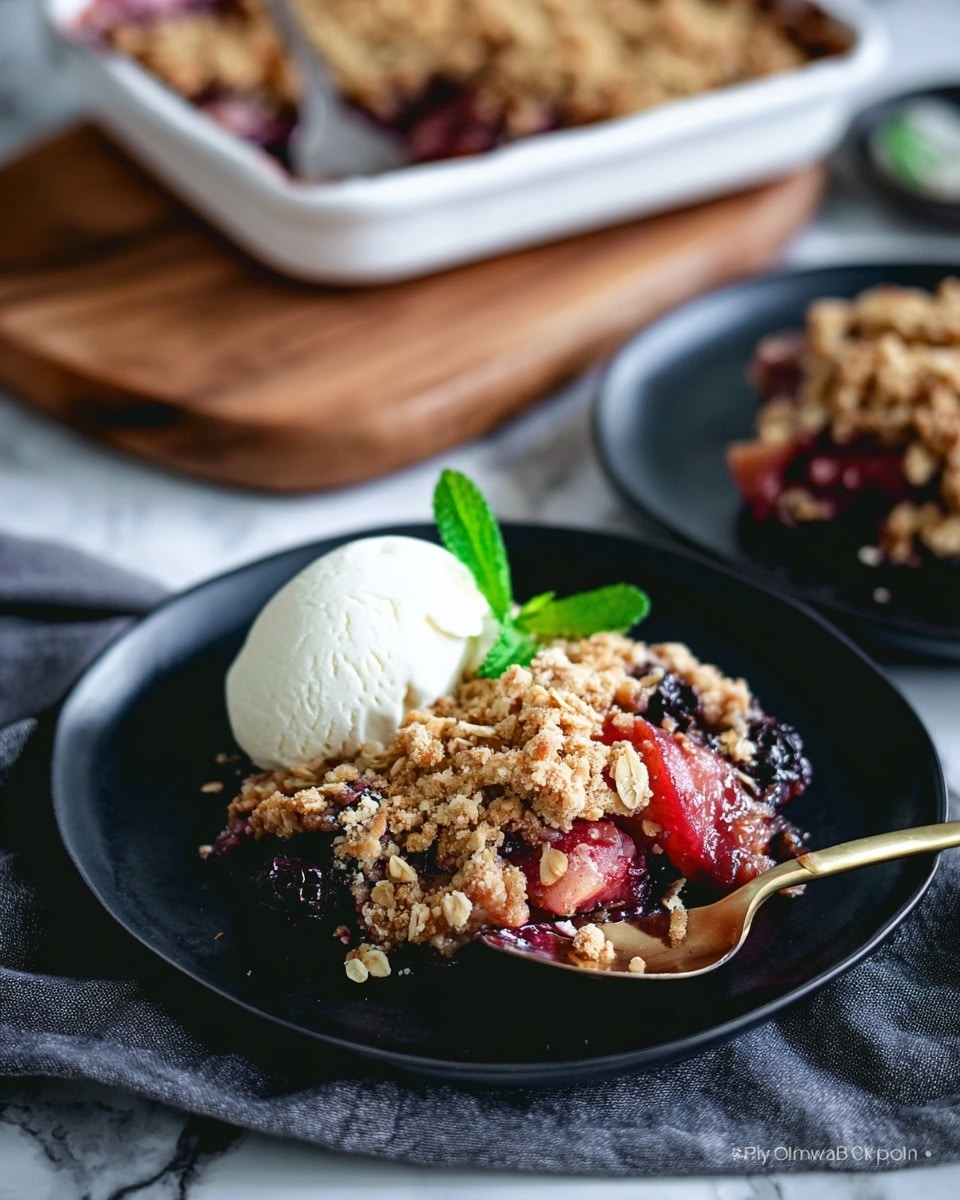
If you’re searching for a dessert that perfectly balances sweet and tart flavors with a satisfyingly crunchy topping, this Apple and Blueberry Crumble Recipe is an absolute must-try. Combining tender, juicy apples with vibrant blueberries, all wrapped beneath a buttery, spiced oat crumble, this dish is a comforting classic that feels like a warm hug in a bowl. It’s simple enough to make on a weeknight but special enough for any occasion, and once you try it, it’s sure to become one of your favorite go-to desserts.
Ingredients You’ll Need
The magic of this Apple and Blueberry Crumble Recipe lies in its straightforward ingredients, each playing a vital role in building layers of texture and flavor. From the fresh fruit that brings a pop of natural sweetness and color to the nutty, crumbly topping that adds crunch and warmth, every element works in harmony to create a truly unforgettable dessert.
- 4 medium apples: Chopped into chunks, these provide a tender, juicy base full of natural sweetness and freshness.
- 1 cup blueberries: Fresh or frozen, blueberries add a lovely burst of juicy tartness and a beautiful color contrast.
- 2 tbsp arrowroot flour: Helps thicken the fruit juices, giving the filling a perfect consistency without cloudiness.
- 1 tbsp freshly squeezed lemon juice: Brightens the flavors and prevents the apples from browning.
- 1 tsp cinnamon: Adds warmth and spice, layering depth into the fruit mixture.
- 3 tbsp maple sugar: Provides a subtle, rich sweetness that complements the fruit naturally.
- 3/4 cup rolled oats: Gives the crumble topping a chewy, hearty texture that’s absolutely irresistible.
- 1/3 cup flour: For structure in the crumble (gluten-free alternatives work well here).
- 1/2 cup crushed walnuts: Or seeds for nut allergies — this adds a lovely crunch and earthy note.
- 6 tbsp cold butter: The secret to achieving that golden, flaky crumble topping (dairy-free options can be substituted).
- 1/3 cup maple sugar: Sweetens the crumble topping, balancing the tart fruit beneath.
- 1/2 tsp cinnamon: Infuses the topping with a cozy aroma and gentle spice.
- 1/4 tsp nutmeg: Or cardamom, for an extra hint of warm, aromatic flavor.
How to Make Apple and Blueberry Crumble Recipe
Step 1: Prepare the Fruit Filling
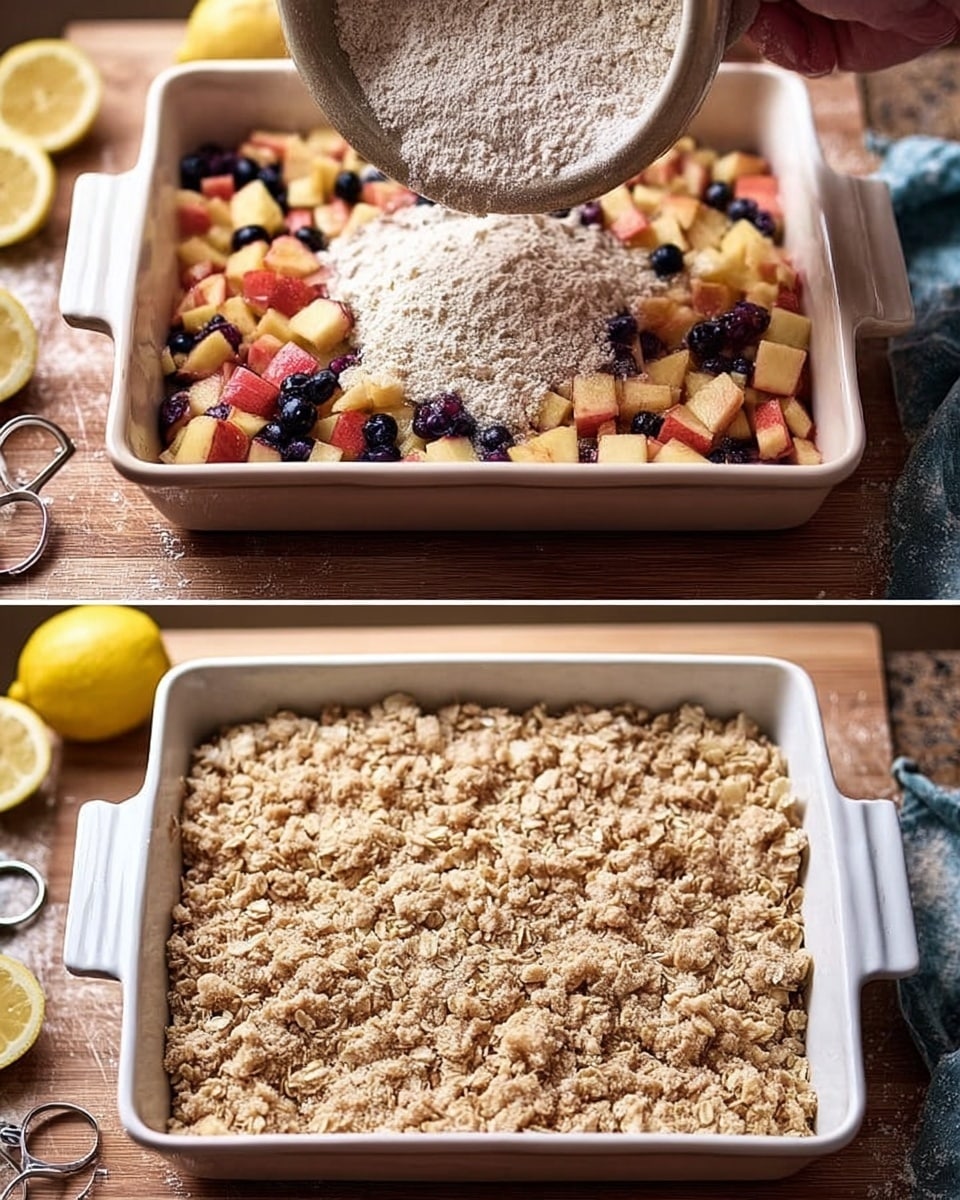
Start by chopping your apples into even chunks so they cook uniformly. Give the blueberries a quick rinse if fresh, or thaw briefly if frozen, then pat dry gently to avoid excess moisture. Toss them together in a mixing bowl with maple sugar, lemon juice, cinnamon, and arrowroot flour. This combination not only sweetens and spices the filling but also thickens the juices as it bakes, ensuring every spoonful is perfectly luscious without being runny. Transfer this mixture into a ceramic-coated 9-inch square pan, spreading it into an even layer to form the base of your crumble.
Step 2: Create the Crumble Topping
Here’s where the butter comes in. Make sure it’s cold—cold butter is essential for a flaky, crumbly texture. Using a food processor, pulse the cold butter together with the flour until the mixture starts to resemble chunky breadcrumbs. If you don’t have a processor, you can rub the butter into the flour by hand, but the food processor will save you some time and energy. Once you have this base, stir in the rolled oats, crushed walnuts, maple sugar, cinnamon, and nutmeg (or cardamom) by hand. These ingredients bring crunch, nutty flavor, and a subtle sweetness that beautifully contrasts the warm fruit filling below.
Step 3: Assemble and Bake
Preheat your oven to 360°F (182°C). Evenly scatter the crumble topping over the prepared apple and blueberry mixture, making sure every corner is nicely covered with the buttery, spiced crumbs. Slide your pan into the oven and bake for about 35 minutes, or until the topping turns a gorgeous golden brown and you can smell the inviting scents of cinnamon and nutmeg filling your kitchen. Once baked, remove from the oven and allow it to cool slightly; this lets the filling thicken up just right so each bite holds together perfectly.
How to Serve Apple and Blueberry Crumble Recipe
Garnishes
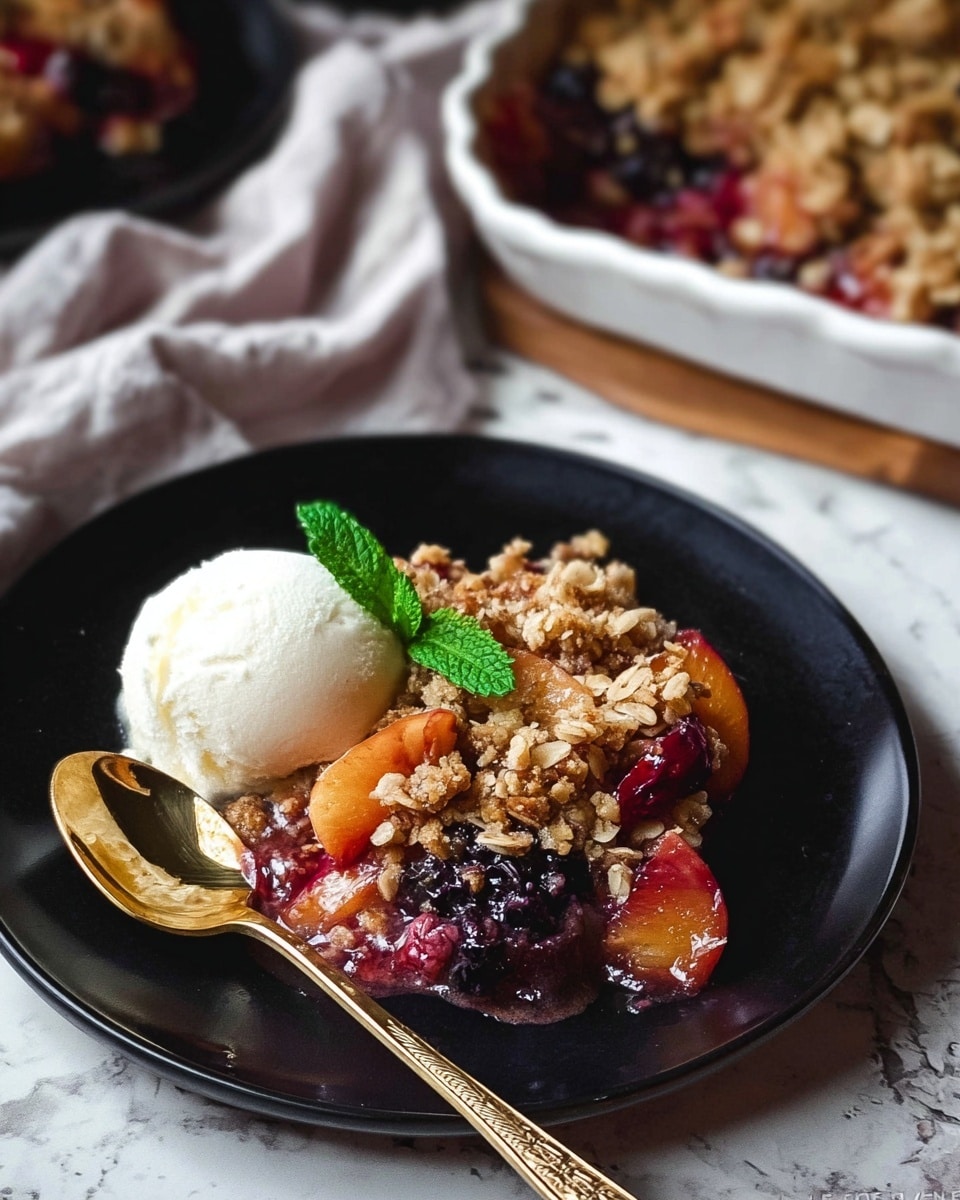
This Apple and Blueberry Crumble Recipe shines brightest when topped with a scoop of vanilla ice cream or a dollop of freshly whipped cream, adding luscious creaminess that melts beautifully into the warm fruit. For an extra touch, sprinkle a few toasted nuts or a drizzle of maple syrup on top to enhance the nutty and sweet flavors. Fresh mint leaves or a light dusting of powdered cinnamon can also add a vibrant finish.
Side Dishes
This crumble stands out as a dessert on its own, but it’s also delightful alongside a simple cup of hot tea or coffee, making for a cozy afternoon treat. If you want to turn it into a more substantial dessert, pair it with a warm custard or a scoop of lemon sorbet, which adds a refreshing contrast to the rich crumble.
Creative Ways to Present
For a charming twist, serve individual portions in ramekins baked separately with their own crumble tops. Layer the filling and topping in clear glasses for a rustic parfait look, perfect for showing off the lovely colors of the apples and blueberries. You can even transform this recipe into mini crumble tarts by using a tart shell base, making it great for parties or potlucks where presentation truly counts.
Make Ahead and Storage
Storing Leftovers
If you happen to have any leftovers (though it’s hard not to finish it in one sitting), store them in an airtight container in the refrigerator. The flavors meld beautifully overnight, and the crumble topping will remain wonderfully crisp for up to three days, though it’s best enjoyed within the first day.
Freezing
This Apple and Blueberry Crumble Recipe freezes very well. To freeze, cover the assembled but unbaked crumble tightly with plastic wrap and foil, then place it in the freezer for up to two months. When you’re ready to enjoy, you can bake it directly from frozen—just add an extra 10 to 15 minutes to the baking time to ensure it cooks through properly.
Reheating
To reheat, pop individual servings or the whole crumble into a preheated oven at 350°F (175°C) for about 15-20 minutes until warmed through and the topping regains its crispness. Avoid microwaving if possible, as it can make the topping soggy, losing that delightful texture that makes this recipe so special.
FAQs
Can I use frozen blueberries for this Apple and Blueberry Crumble Recipe?
Absolutely! Frozen blueberries work perfectly. Just be sure to thaw and drain any excess liquid before adding them to the filling to avoid ending up with a watery crumble.
What can I use instead of butter for a dairy-free crumble?
You can substitute cold coconut oil or a dairy-free margarine in equal amounts. These will still give you a crispy, flaky topping with a slightly different but equally delicious flavor.
How do I make this crumble gluten-free?
Simply swap the regular flour for a gluten-free all-purpose flour blend that measures cup for cup. Make sure your oats are certified gluten-free if you have a sensitivity.
Can I prepare the crumble topping ahead of time?
Yes, you can prepare the crumble topping a day in advance and keep it refrigerated. Just give it a quick stir before sprinkling it on top of the fruit filling to refresh the texture before baking.
How can I tell when the crumble is perfectly baked?
Look for a golden brown topping that is slightly crisp to the touch and bubbling fruit filling around the edges. The aroma of cinnamon and nutmeg wafting through your kitchen is also a great signal that it’s ready to come out of the oven.
Final Thoughts
This Apple and Blueberry Crumble Recipe is one of those truly heartwarming desserts that feels like home in every bite. Whether you’re whipping it up for a casual family dinner or a special celebration, it never fails to impress and delight. So, grab those apples and blueberries, and get ready to enjoy a classic crumble that’s bursting with flavor and made with love. You won’t regret it!
Print
Apple and Blueberry Crumble Recipe
- Total Time: 52 minutes
- Yield: 6 servings
- Diet: Gluten Free
Description
This Apple and Blueberry Crumble is a delightful dessert featuring juicy apples and blueberries covered with a buttery, crunchy topping made of oats, walnuts, and warm spices. Perfectly balanced with maple sugar and cinnamon, this crumble is a comforting treat that can be enjoyed warm or at room temperature.
Ingredients
Filling
- 4 medium apples, cut into chunks
- 1 cup blueberries, fresh or frozen
- 2 tbsp arrowroot flour (or other starchy flour)
- 1 tbsp freshly squeezed lemon juice
- 1 tsp cinnamon
- 3 tbsp maple sugar (or your favorite sweetener)
Crumble Topping
- 3/4 cup rolled oats
- 1/3 cup flour (for gluten-free option, use gluten-free flour)
- 1/2 cup crushed walnuts (or seeds if allergic to nuts)
- 6 tbsp cold butter (for dairy-free, use plant-based butter)
- 1/3 cup maple sugar (or your preferred granulated sugar)
- 1/2 tsp cinnamon
- 1/4 tsp nutmeg (or cardamom)
Instructions
- Prepare Butter: Place 6 tablespoons of butter in the freezer for at least 1 hour before starting. This ensures the butter is cold for making the crumble topping.
- Prepare the Filling: Chop the apples into chunks. Rinse and pat dry the blueberries. In a pie dish (a 9-inch square pan with ceramic coating works well), combine the maple sugar, freshly squeezed lemon juice, cinnamon, and arrowroot flour. Add the apples and blueberries, toss gently to coat evenly, and spread them in an even layer.
- Make the Crumble Topping: If using a food processor, add the cold butter and 1/3 cup of flour into the bowl, pulsing until the mixture resembles coarse crumbs. Transfer to a mixing bowl if desired. To this mixture, add the cinnamon, nutmeg, maple sugar, crushed walnuts, and rolled oats. Mix thoroughly by hand or with a spatula until well combined.
- Assemble and Bake: Preheat the oven to 360°F (182°C). Evenly scatter the crumble topping over the apple and blueberry filling. Place the dish in the oven and bake for approximately 35 minutes or until the topping is golden brown and crisp.
- Cool and Serve: Remove the crumble from the oven and let it cool slightly. This dessert can be enjoyed warm, at room temperature, or cold according to preference. Serve as is or with your favorite accompaniment like vanilla ice cream or cream.
Notes
- For a gluten-free crumble topping, substitute the all-purpose flour with a gluten-free flour blend.
- For a dairy-free version, replace the butter with a plant-based or vegan butter alternative.
- You can use frozen blueberries, but be sure to thaw and drain excess liquid to avoid a soggy filling.
- Maple sugar can be substituted with brown sugar or coconut sugar depending on availability and taste preference.
- Using a ceramic-coated baking pan negates the need for greasing, but if using a different pan, consider greasing to prevent sticking.
- Prep Time: 15 minutes
- Cook Time: 35 minutes
- Category: Dessert
- Method: Baking
- Cuisine: American


