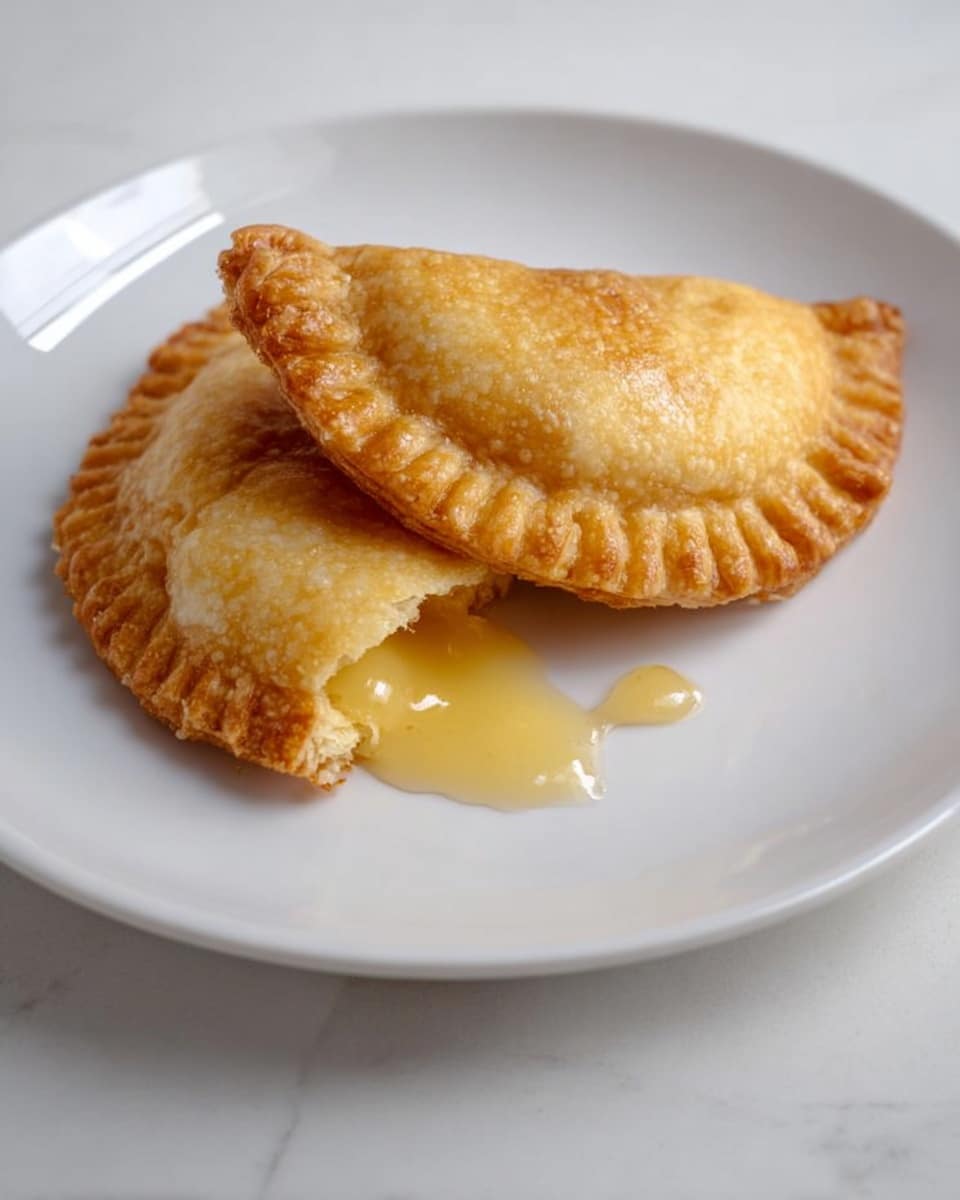
There is something truly magical about Easter Hand Pies with Lemon and Cherry Fillings Recipe that brings a burst of sunshine and sweetness to any celebration. These charming hand pies are not only adorable but also delightfully tender, with a perfectly flaky crust and vibrant, tangy lemon filling paired with luscious cherry goodness. Whether you’re serving them for brunch, dessert, or just a cozy snack, this recipe captures the joyful spirit of spring with every bite, making it an instant family favorite that’s as fun to make as it is to eat.
Ingredients You’ll Need

The beauty of this Easter Hand Pies with Lemon and Cherry Fillings Recipe is in its simplicity. Each ingredient plays a crucial role in creating the perfect balance of flaky crust and flavorful filling, while a few finishing touches add sparkle and sweetness that make these pies truly special.
- 1 box premade pie crust: This saves you time and ensures a flaky, buttery base every time.
- 6 tablespoons lemon pie filling: Offers a zesty, tangy punch that brightens the pies.
- 6 tablespoons cherry filling: Delivers a sweet, juicy contrast to the lemon.
- Spray oil: Helps achieve that golden, crisp finish on the crust.
- Colored sprinkles: Adds festive pops of color, perfect for Easter celebrations.
- Sparkling sugar: Gives a shimmering sparkle that catches the light beautifully.
- 1/2 cup powdered sugar: Essential for making a light, sweet glaze.
- 1 tablespoon milk: Combines with powdered sugar to create the perfect drizzle consistency.
How to Make Easter Hand Pies with Lemon and Cherry Fillings Recipe
Step 1: Prepare the Pie Crust Shapes
Start by rolling out your premade pie crust on a clean surface. Use an Easter-themed cookie cutter to cut out an even number of shapes. This fun step instantly elevates your pies, setting the tone for a festive treat that everyone will adore.
Step 2: Add the Fillings
Place a tablespoon of either lemon or cherry pie filling on every other shape, spacing it carefully in the center. This is where the magic begins as the sweet and tangy fillings promise a delightful surprise inside each hand pie.
Step 3: Seal the Pies
Dip a finger into a bowl of water and run it around the edges of the filled crust shapes. This simple trick helps the top crust stick firmly, sealing in the delicious fillings. Then place the remaining crust shapes over the filled ones and press the edges together with a fork, creating a charming pattern and a tight seal.
Step 4: Preheat and Prepare for Baking
Decide whether to bake in the oven or use an air fryer. Preheat your oven to 400 degrees F or the air fryer to 370 degrees F. Lightly coat each hand pie with spray oil to ensure a golden, crispy crust once cooked. Add colored sprinkles or sparkling sugar on top if you want to make them extra festive.
Step 5: Bake the Hand Pies
If air frying, place the pies inside and cook for 5-8 minutes, keeping a close eye as they brown quickly near the end. If using an oven, place the pies on a baking sheet and bake for 15-20 minutes, until the tops turn a perfect golden brown. Patience here is rewarding, as the flaky crust and bubbling filling will be irresistible.
Step 6: Cool and Glaze
Let the hand pies cool for 5-10 minutes to avoid a burning surprise from the hot filling. While they cool, whisk together powdered sugar and milk until smooth. Drizzle the glaze over the cooled pies for a sweet finish that ties the whole Easter Hand Pies with Lemon and Cherry Fillings Recipe together beautifully.
How to Serve Easter Hand Pies with Lemon and Cherry Fillings Recipe
Garnishes
A sprinkle of extra colored sugar or a few fresh mint leaves can add a fresh look and complementary flavor. Adding a light dusting of powdered sugar right before serving also enhances their inviting appearance and adds a touch of sweetness.
Side Dishes
Pair these hand pies with a scoop of vanilla ice cream or a dollop of whipped cream for a delightful contrast of hot and cold. Fresh berries or a simple fruit salad also make wonderful sides, enhancing the fruity flavors inside the pies without overpowering them.
Creative Ways to Present
Present your Easter hand pies on a pastel-colored platter or a rustic wooden board adorned with fresh spring flowers to evoke a festive feel. You can even place them in individual paper liners for easy, mess-free enjoyment at brunch tables or picnics.
Make Ahead and Storage
Storing Leftovers
Leftover pies should be kept in an airtight container at room temperature for up to two days. This keeps the crust crisp and filling fresh, so every bite tastes just as heavenly as when first baked.
Freezing
You can freeze the fully baked pies by wrapping each individually in plastic wrap and storing them in a zip-top freezer bag for up to a month. When ready to enjoy, thaw them overnight in the fridge.
Reheating
To reheat, place the pies on a baking sheet and warm in a preheated 350 degrees F oven for about 10 minutes. This method revives the flaky crust and warms the filling evenly without making the pies soggy.
FAQs
Can I use homemade pie crust for Easter Hand Pies with Lemon and Cherry Fillings Recipe?
Absolutely! Homemade crust can add a wonderful personal touch and even more flavor, though premade crust is a fantastic time saver that still delivers great results.
Is it possible to make these hand pies gluten-free?
Yes, by using a gluten-free pie crust, you can adapt this recipe while maintaining the delightful texture and flavor of the filling.
Can I prepare the hand pies in advance and bake later?
You can assemble the pies, then cover them and keep refrigerated for up to 24 hours before baking. Just be sure to bake them fresh for the best texture.
How do I prevent the filling from leaking while baking?
Sealing the edges carefully with water and pressing firmly with a fork helps keep the fillings inside. Also, avoid overfilling the pies to minimize any leaks.
What if I don’t have an air fryer? Can I still make this recipe?
Definitely! The oven method described works perfectly and is a great alternative if an air fryer isn’t available.
Final Thoughts
This Easter Hand Pies with Lemon and Cherry Fillings Recipe is a delightful way to celebrate the season with magic, flavor, and a bit of sparkle. They’re easy to make, beautiful to present, and absolutely delicious to share. So go on, gather your ingredients and fill your kitchen with the warm, sweet scent of freshly baked hand pies. Your family and friends will thank you for this unforgettable treat!
Print
Easter Hand Pies with Lemon and Cherry Fillings Recipe
- Total Time: 18-28 minutes depending on cooking method
- Yield: 6 servings (6 hand pies)
- Diet: Vegetarian
Description
These delightful Easter Hand Pies are a festive and fun treat perfect for spring celebrations. Made with premade pie crust and filled with luscious lemon and cherry pie fillings, these hand pies are easy to assemble and can be cooked quickly in an air fryer or oven. Topped with colorful sprinkles or sparkling sugar and finished with an optional sweet glaze, they offer a perfect balance of tart and sweet flavors in a portable, handheld pastry.
Ingredients
Pie Crust
- 1 box premade pie crust
Fillings
- 6 tablespoons lemon pie filling (or your favorite flavor)
- 6 tablespoons cherry filling
Toppings & Glaze
- spray oil (for coating)
- colored sprinkles (optional)
- sparkling sugar (optional)
- 1/2 cup powdered sugar
- 1 tablespoon milk
Instructions
- Cut Pie Crust: Roll out the premade pie crust on a clean surface. Use an Easter-themed cookie cutter to cut out shapes for the hand pies.
- Add Filling: Place about a tablespoon of lemon or cherry pie filling on every other shape cut from the pie crust, ensuring not to overfill.
- Moisten Edges: Dip your finger in a bowl of water and run it around the edge of the shapes that have filling. This helps seal the pies when you place the top layer on.
- Seal Pies: Place a second cut-out shape on top of the filled shapes. Press the edges together firmly using a fork to crimp and seal the pies well.
- Preheat Cooking Appliance: Preheat your air fryer to 370°F (188°C) or your oven to 400°F (204°C), depending on which cooking method you choose.
- Coat and Decorate: Lightly spray the sealed hand pies with oil. Sprinkle colored sprinkles or sparkling sugar on top if desired for a festive finish.
- Cook the Pies: For air fryer: Place the pies in the basket and cook at 370°F for 5-8 minutes, watching carefully as they brown quickly toward the end.
For oven: Arrange the pies on a baking sheet and bake for 15-20 minutes until golden brown on top. - Cool Pies: Remove the pies and allow them to cool for 5-10 minutes. The filling inside will be hot, so cooling ensures safe and pleasant eating.
- Prepare Optional Glaze: In a medium bowl, whisk together powdered sugar and milk until smooth and combined.
- Glaze the Pies: Drizzle the prepared glaze over the cooled hand pies for added sweetness and an attractive finish.
Notes
- Use any flavor of pie filling you like, such as apple or blueberry, to customize your hand pies.
- Be careful not to overfill the pies to avoid leakage during cooking.
- If you don’t have an air fryer, baking in a conventional oven produces equally delicious results.
- Cool the pies thoroughly before glazing to prevent the glaze from melting off.
- Sprays oils with neutral flavor like canola or vegetable oil work best.
- Prep Time: 8 minutes
- Cook Time: 8 minutes (air fryer) or 20 minutes (oven)
- Category: Dessert
- Method: Air Frying
- Cuisine: American


