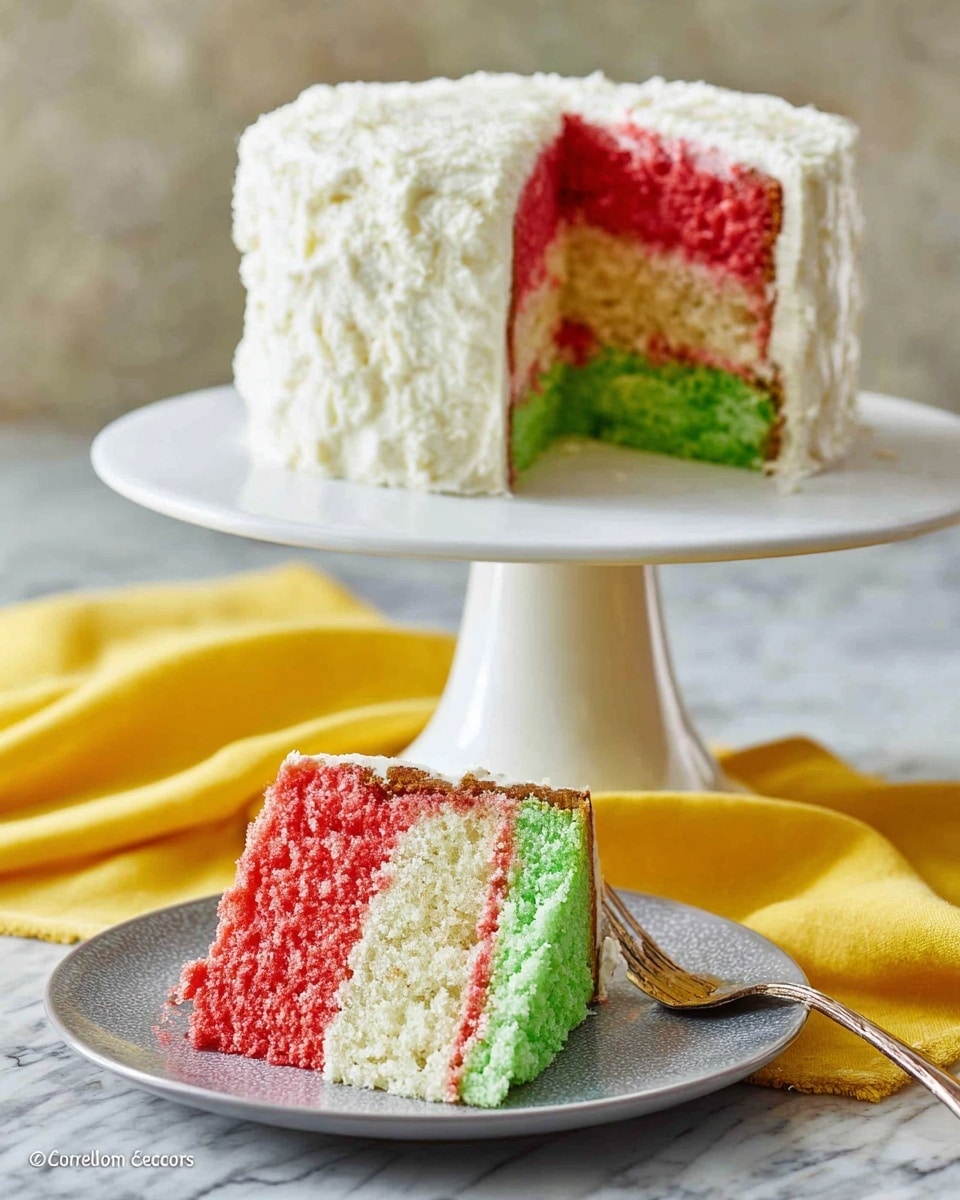
If you’re looking to brighten up your dessert table and delight your taste buds with every bite, this Colorful Jello Poke Cake Recipe is an absolute must-try. Combining the moist texture of a classic white cake with vibrant, fruity gelatin and fluffy whipped topping, it creates a playful and irresistible treat that’s as fun to make as it is to eat. Each layer is infused with bursts of color and flavor, making this cake a showstopper at any gathering or just a cheerful end to any meal.
Ingredients You’ll Need
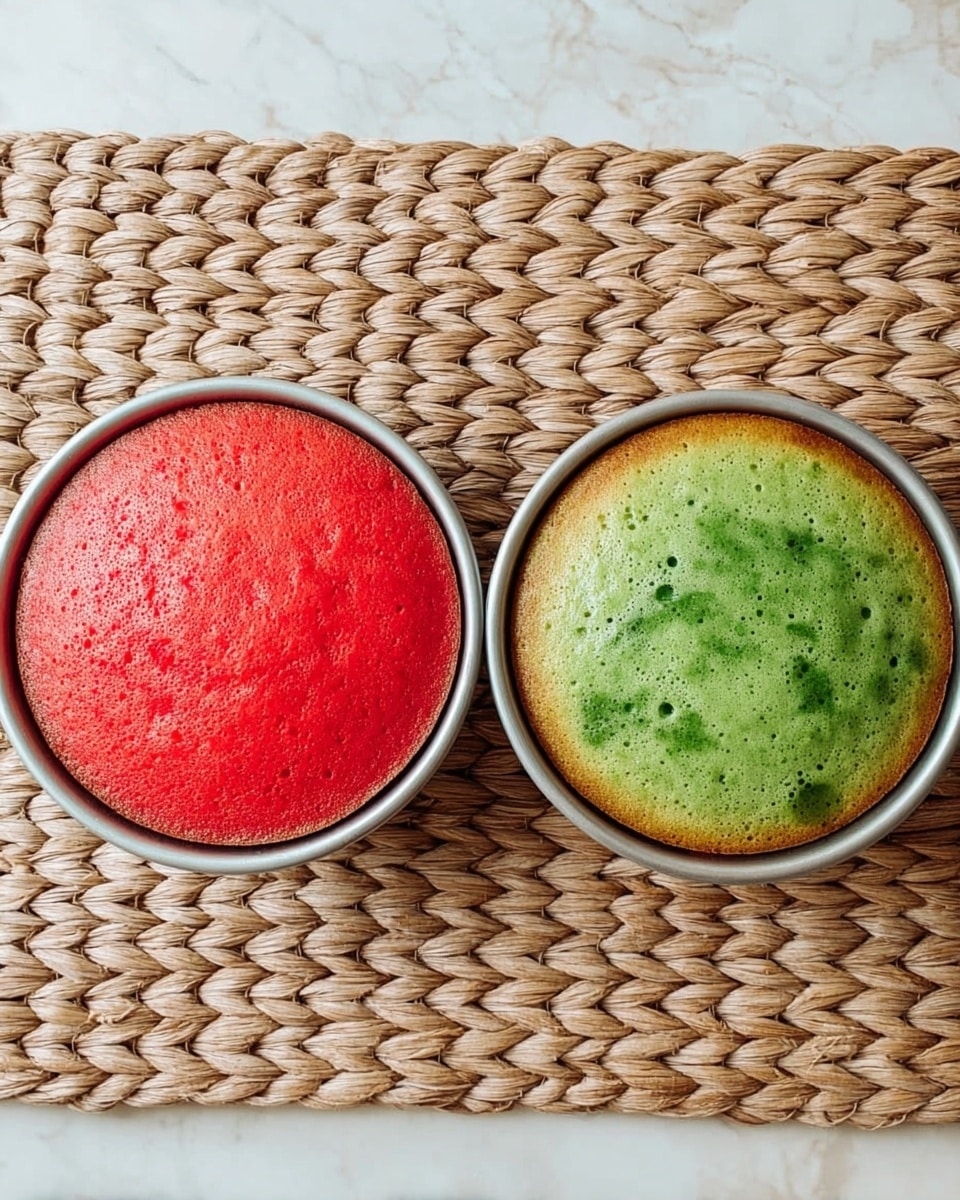
This recipe calls for a handful of simple, everyday ingredients, each playing a crucial role in delivering the perfect balance of flavor, texture, and eye-catching color. From the soft white cake layers to the colorful Jell-O and creamy whipped topping, every element is essential in crafting this delightful dessert.
- 2 baked 9-inch white cake layers: Choose a moist, fluffy white cake as the base for the perfect canvas.
- 2 cups boiling water: Necessary to fully dissolve the gelatin for even flavor and color distribution.
- 2 packages Jell-O (colors/flavors of choice): Pick your favorite vibrant flavors to add a fun visual and fruity punch.
- 12 ounces Cool Whip: Adds a light, creamy finish that balances the sweet and tangy jello layers beautifully.
How to Make Colorful Jello Poke Cake Recipe
Step 1: Prepare the Cake Layers
Start by placing the two baked 9-inch white cake layers top side up, each in its own cake pan. To allow the gelatin to seep into the cake, pierce the layers evenly with a large fork at half-inch intervals. This step ensures the colorful Jell-O will infuse the cake with vibrant flavor and moisture.
Step 2: Dissolve the Gelatin
In two separate bowls, stir one cup of boiling water into each package of Jell-O until fully dissolved, roughly two minutes. This step is crucial for that smooth gelatin texture that’ll soak into the cake and create those stunning pockets of color and flavor.
Step 3: Pour Gelatin Over Cake Layers
Carefully pour one flavor of the dissolved gelatin over one cake layer and the other flavor over the second layer, making sure to cover the layers evenly. The gelatin will sink into the pierced areas, infusing the cake with vibrant hues and a juicy, fruity taste.
Step 4: Refrigerate to Set
Refrigerate the cake layers for about three hours. This gives the gelatin enough time to fully set inside the cake, transforming it into a delightfully moist and colorful treat that’s ready for assembly.
Step 5: Unmold the First Layer
To unmold your first cake layer from the pan smoothly, dip the pan into warm water for 10 seconds. This loosens the sides and helps the cake slide out cleanly. Place it carefully on a serving plate to start building your layered masterpiece.
Step 6: Add Whipped Topping
Spread one cup of Cool Whip generously over the first cake layer. This creamy layer not only adds richness but also acts as a delicious barrier between the two jiggly gelatin-infused cakes.
Step 7: Add and Unmold the Second Layer
Repeat the warm water dip for the second cake layer and gently place it on top of the whipped topping-covered first layer. This step combines the colors and flavors into one stunning dessert.
Step 8: Frost the Top
Frost the entire top of the cake with the remaining whipped topping, creating a smooth and fluffy finish that balances the tang of the jello and the moist cake base perfectly.
Step 9: Garnish and Serve
Feel free to get creative with garnishes that complement your Jell-O flavors or add a bit of texture, making your Colorful Jello Poke Cake Recipe even more special.
How to Serve Colorful Jello Poke Cake Recipe
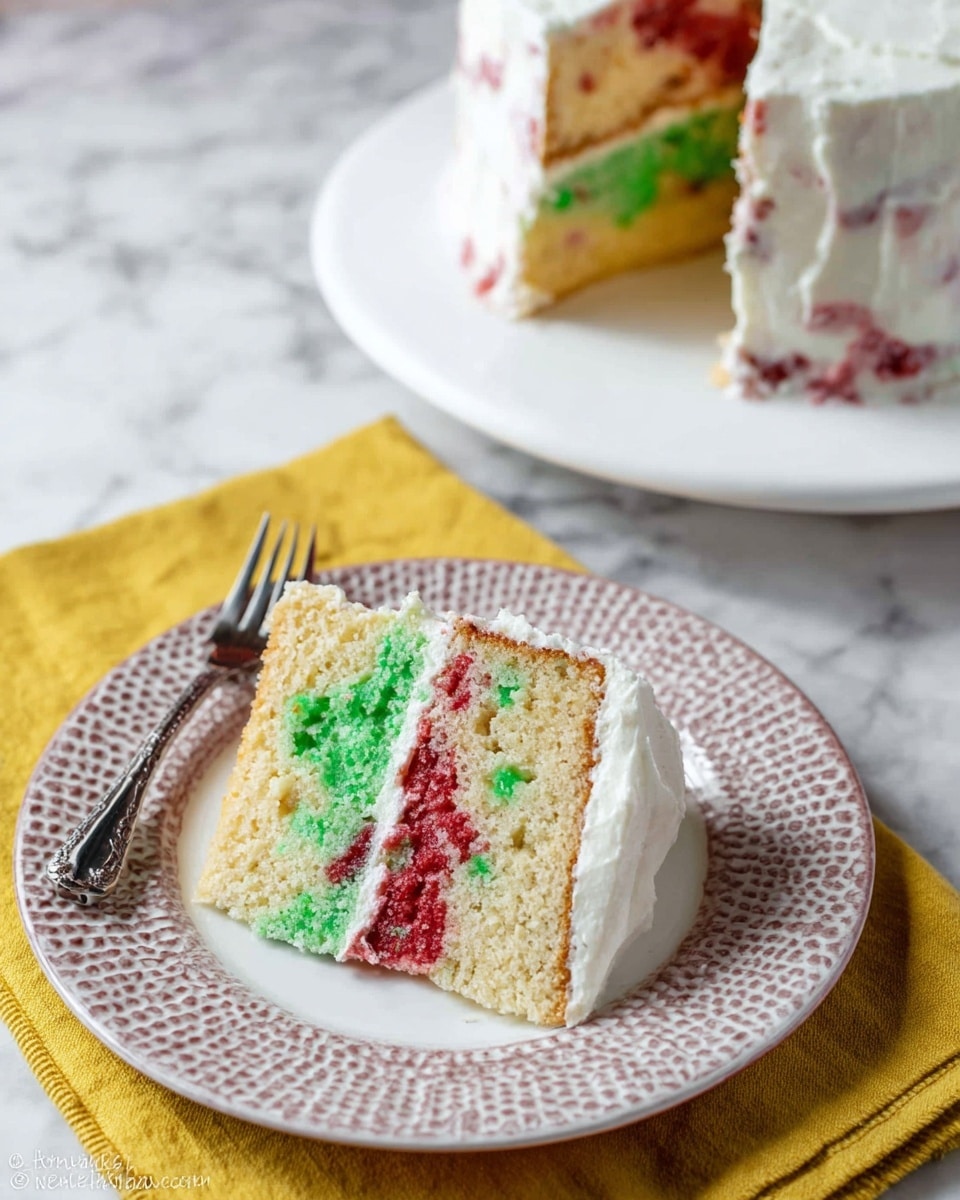
Garnishes
Fresh berries, sprinkles, or mint leaves make exquisite garnishes that not only enhance the appearance but brighten the flavors of your cake. You can also add a drizzle of fruit syrup to mirror the gelatin flavors for an indulgent touch.
Side Dishes
This cake pairs beautifully with a scoop of vanilla ice cream or a fresh fruit salad, which complements the fruity tones and adds an extra refreshing element to your dessert experience.
Creative Ways to Present
Try serving this Colorful Jello Poke Cake Recipe in individual clear cups to showcase its layers, or cut it into fun shapes using cookie cutters for a playful party treat. For a stunning centerpiece, garnish with edible flowers to make it look as fantastic as it tastes.
Make Ahead and Storage
Storing Leftovers
Store any leftover cake covered tightly with plastic wrap or in an airtight container in the refrigerator. The poke cake stays moist and perfectly flavored for up to three days, making it ideal for prepping ahead or enjoying over several days.
Freezing
While freezing is possible, the texture of the gelatin may slightly change upon thawing. To freeze, wrap the cake well in plastic wrap and foil, then thaw it overnight in the refrigerator before serving for the best results.
Reheating
This cake is best enjoyed chilled, so reheating is not recommended. Instead, allow it to come to a pleasant cool temperature straight from the fridge, where the flavors and textures truly shine.
FAQs
Can I use a different cake base?
Absolutely! While white cake works best for showcasing the colors, yellow or even angel food cake can be fun alternatives. Just ensure they stay moist for the gelatin to soak in properly.
What gelatin flavors work best?
Choose contrasting or complementary flavors for a vibrant look and balanced taste. Popular combos include cherry and lime, orange and raspberry, or grape and strawberry.
Can I make this cake gluten-free?
Yes! Simply use gluten-free white cake layers and double-check your gelatin and whipped topping are gluten-free as well. This way, everyone can enjoy the colorful fun.
How long does the gelatin take to set?
About three hours in the refrigerator is ideal to allow the gelatin to fully absorb and firm up inside the cake layers.
Is it okay to use homemade whipped cream?
Definitely! Homemade whipped cream adds a fresh, airy touch and can be lightly sweetened to your taste, making your Colorful Jello Poke Cake Recipe even more delectable.
Final Thoughts
This Colorful Jello Poke Cake Recipe has a special way of bringing joy to any occasion with its lively colors and delightful flavors. It’s easy to make but makes a big impression, so don’t hesitate to whip it up and share the fun. Trust me, once you try it, this vibrant dessert will quickly become a beloved favorite for you and your friends.
Print
Colorful Jello Poke Cake Recipe
- Total Time: 3 hours 15 minutes
- Yield: 12 servings
Description
This vibrant and fun Colorful Jello Poke Cake combines moist white cake layers infused with colorful Jell-O gelatin for a playful twist. Soft cake layers are pierced and soaked with two different flavors of Jell-O, creating a beautifully marbled effect inside. The cake is then chilled, layered, and frosted with fluffy Cool Whip, making it a refreshing and eye-catching dessert perfect for parties and family gatherings.
Ingredients
Cake Layers
- 2 baked 9-inch white cake layers
Gelatin
- 2 packages Jell-O (colors/flavors of choice)
- 2 cups boiling water
Frosting
- 12 ounces Cool Whip
Instructions
- Prepare Cake Layers: Place the two baked 9-inch white cake layers top side up in separate 9-inch round cake pans. Use a large fork to pierce the cake layers evenly at half-inch increments to allow the gelatin to soak in.
- Dissolve Gelatin: In two separate bowls, stir 1 cup of boiling water into each package of Jell-O. Mix for about 2 minutes or until the gelatin is completely dissolved.
- Pour Gelatin Over Cakes: Carefully pour one flavor of gelatin evenly over one cake layer and the other flavor over the second cake layer. Ensure even coverage so the gelatin seeps into the pierced holes.
- Chill Cakes: Refrigerate both cake layers for 3 hours to let the gelatin set fully and infuse into the cake.
- Unmold First Cake Layer: Dip one cake pan into warm water for 10 seconds to loosen the cake. Gently invert the pan onto a serving plate to unmold the first cake layer.
- Frost First Layer: Spread 1 cup of Cool Whip evenly over the surface of the first cake layer.
- Unmold Second Layer: Repeat the warming and unmolding process with the second cake layer, then carefully place it on top of the frosted first layer.
- Frost Second Layer: Use the remaining Cool Whip to frost the top and sides of the assembled cake completely.
- Garnish: Add any desired garnishes such as fresh fruit, sprinkles, or extra whipped topping. Serve chilled for best results.
Notes
- Choose contrasting colors and flavors of Jell-O for a more visually striking effect inside the cake.
- Make sure the cake layers are cooled completely before piercing and pouring gelatin to prevent melting or sogginess.
- For easier unmolding, carefully dip the cake pans in warm water just enough to loosen the cake without melting the gelatin.
- This cake is best served chilled and consumed within 2-3 days to maintain freshness.
- Feel free to substitute Cool Whip with homemade whipped cream if desired for a fresher taste.
- Prep Time: 15 minutes
- Cook Time: 0 minutes
- Category: Dessert
- Method: No-Cook
- Cuisine: American


