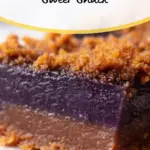
Diving into the delightful world of chewy, sweet treats, this Ube Butter Mochi Recipe brings a vibrant purple hue and an irresistible, melt-in-your-mouth texture that you’ll fall head over heels for. Combining the rich, nutty essence of coconut milk with the uniquely fragrant ube, this recipe captures the essence of comfort and tropical indulgence. Whether it’s a special occasion or simply a craving for something extraordinary, this Ube Butter Mochi Recipe will become your go-to. Trust me, every bite feels like a warm hug wrapped in velvet softness with that perfect buttery finish.
Ingredients You’ll Need

The magic of this Ube Butter Mochi Recipe lies in its few but essential ingredients that work harmoniously to create that iconic chewy texture and vibrant flavor. Each component is carefully chosen to enhance the taste, color, and consistency, making the preparation straightforward yet deeply satisfying.
- 2 eggs (lightly whisked): They provide the structure and a little lift to the mochi, helping it achieve that perfect chewy softness.
- 1 cup milk (room temperature): This balances moisture and adds smoothness to the batter.
- 180 ml coconut milk (room temperature): Packed with rich flavor, coconut milk deepens the moistness and infuses a subtle tropical note.
- ½ teaspoon vanilla extract: Adds a warm, aromatic undertone that complements the ube beautifully.
- 1 teaspoon ube extract: This is the star ingredient, bringing that stunning purple color and sweet, nutty flavor unique to ube.
- 225 grams (7.94 ounces) mochiko flour (glutinous rice flour): Essential for that chewy, sticky texture hallmark to mochi desserts.
- 60 grams (2.12 ounces) butter (melted): Butter adds richness and helps the mochi develop its tender crumb.
- 1 cup (195 grams, 6.88 ounces) granulated sugar: Sweetens the mochi to perfection while caramelizing slightly during baking.
- ½ tablespoon baking powder (levelled): Helps with a subtle rise, making the mochi light without losing chewiness.
- ¼ teaspoon salt: Balances sweetness and enhances all the flavors.
How to Make Ube Butter Mochi Recipe
Step 1: Prepare Your Oven and Baking Tin
Start by preheating your oven to 180°C (356°F) and generously greasing a baking tin sized about 23.5 cm by 17 cm (9.25 inches x 6.69 inches). Line the tin with parchment paper to ensure your mochi comes out cleanly and retains every bit of its buttery essence without sticking to the pan.
Step 2: Mix the Wet Ingredients
In a medium mixing bowl, combine your lightly whisked eggs, room temperature milk, creamy coconut milk, vanilla extract, fragrant ube extract, and melted butter. Whisk these together until the mixture is perfectly smooth and uniform, ready to lend that signature flavor and moisture to your mochi.
Step 3: Combine the Dry Ingredients
Grab a larger mixing bowl and sift in your mochiko flour to avoid lumps, then add the granulated sugar, baking powder, and salt. Stir these dry components together thoroughly, ensuring every particle is evenly blended for a consistent batter.
Step 4: Bring Wet and Dry Together
Now, gradually pour the wet mixture into the dry ingredients. Stir patiently until fully combined with no lumps in sight. The batter will be thick but smooth, signaling that you’re one step closer to that glorious mochi texture.
Step 5: Transfer and Settle the Batter
Pour the rich purple batter into your prepared tin. Give the pan a gentle tap against your countertop to release trapped air bubbles, helping maintain a smooth surface and even baking throughout your mochi.
Step 6: Bake to Golden Perfection
Slide the tin into your preheated oven and bake for about 55 to 60 minutes. Watch as the top turns a gorgeous golden brown. If you notice the top browning too fast before the inside is cooked, loosely cover the mochi with aluminum foil to protect it while it finishes baking.
Step 7: Cool and Slice
Once done, remove your mochi from the oven and allow it to cool completely inside the tin. Patience here rewards you with an easier cut and perfect texture. When cooled, cut into approximately 12 pieces about 8cm by 5cm (3.15 inches x 1.97 inches), and get ready to enjoy each chewy bite.
How to Serve Ube Butter Mochi Recipe

Garnishes
When serving this Ube Butter Mochi Recipe, consider a delicate dusting of powdered sugar or a light sprinkle of toasted coconut flakes to elevate its tropical vibe. For an extra indulgence, a small dollop of whipped cream on the side adds a creamy contrast to the chewy texture that is simply divine.
Side Dishes
This mochi pairs beautifully with fresh fruits like mango, pineapple, or even a cooling scoop of coconut ice cream. These fresh or frozen accompaniments bring refreshing brightness that complements the rich, buttery sweetness of the ube mochi.
Creative Ways to Present
For a party or special occasion, serve the ube butter mochi in bite-sized cubes on a pretty platter lined with banana leaves or tropical flowers for an authentic island-inspired presentation. Alternatively, stack mini squares on dessert skewers interspersed with fresh berries for a playful and elegant display.
Make Ahead and Storage
Storing Leftovers
If you find yourself with leftovers, wrap individual portions tightly in plastic wrap or store them in an airtight container at room temperature. The mochi stays chewy and fresh for up to 2 days, perfect for quick snacking or sharing a treat with friends without losing that signature texture.
Freezing
This Ube Butter Mochi Recipe also freezes beautifully. Place wrapped pieces in a freezer-safe container or bag, ensuring minimal exposure to air to prevent freezer burn. Frozen mochi can last up to 1 month and retain that chewy charm once thawed.
Reheating
To enjoy your mochi warm after storage or freezing, gently reheat in a microwave for 10 to 15 seconds or warm them in a low oven wrapped in foil. This quick warming helps bring back the soft, buttery gooeyness that makes the mochi so irresistible.
FAQs
Can I use fresh ube instead of ube extract?
Yes, fresh ube can be used but it requires cooking, mashing, and often additional preparation such as drying or pureeing to replicate the flavor intensity and texture that ube extract easily delivers. Extract is more convenient and gives the consistent purple color that’s signature to this recipe.
Is mochiko flour gluten-free?
Absolutely! Mochiko is glutinous rice flour, naturally gluten-free, which makes this mochi recipe a great choice for those avoiding gluten but still wanting a chewy, comforting dessert.
Can I substitute butter with oil?
Butter adds a unique richness and flavor, but you can substitute melted coconut oil for a dairy-free or vegan twist. The texture may be slightly different but still delightfully moist and tender.
How do I know when the mochi is fully baked?
You want the top to achieve a nice golden brown color and for a toothpick inserted in the center to come out mostly clean with just a few moist crumbs. The mochi will still be delightfully soft and chewy rather than dry or doughy.
Can I add other flavors to this Ube Butter Mochi Recipe?
Definitely! This recipe is quite versatile. Consider adding a handful of macadamia nuts for crunch, a swirl of cream cheese for tanginess, or even a sprinkle of cinnamon for warmth. Just be mindful not to overpower the signature ube flavor.
Final Thoughts
If you’ve been searching for that perfect balance between chewy, sweet, and utterly comforting dessert, this Ube Butter Mochi Recipe delivers in every way. It’s a celebration of flavor and texture wrapped in a beautiful purple package that’s as fun to make as it is to eat. I can’t wait for you to try it and make it your new favorite treat to share with family and friends.
Print
Ube Butter Mochi Recipe
- Total Time: 1 hour 5 minutes
- Yield: 12 servings
Description
Ube Butter Mochi is a delightful fusion dessert combining the chewy texture of glutinous rice flour with the rich, creamy flavors of coconut milk and ube extract. This baked mochi offers a unique purple hue and a sweet, buttery taste that makes it a perfect treat for gatherings or special occasions.
Ingredients
Wet Ingredients
- 2 eggs (lightly whisked)
- 1 cup milk (room temperature)
- 180 ml coconut milk (room temperature)
- ½ teaspoon vanilla extract
- 1 teaspoon ube extract
- 60 grams (2.12 ounces) butter (melted)
Dry Ingredients
- 225 grams (7.94 ounces) mochiko flour (glutinous rice flour)
- 1 cup (195 grams, 6.88 ounces) granulated sugar
- ½ tablespoon baking powder (levelled)
- ¼ teaspoon salt
Instructions
- Preheat and Prepare Pan: Preheat your oven to 180°C (356°F). Grease and line a 23.5 cm x 17 cm (9.25 inches x 6.69 inches) baking tin with parchment paper to prevent sticking.
- Mix Wet Ingredients: In a medium mixing bowl, combine the lightly whisked eggs, room temperature milk, coconut milk, vanilla extract, ube extract, and melted butter. Mix thoroughly until the mixture is smooth and well combined.
- Combine Dry Ingredients: In a larger mixing bowl, add mochiko flour, granulated sugar, baking powder, and salt. Stir the dry ingredients together until evenly mixed.
- Incorporate Wet into Dry: Gradually pour the wet ingredients into the dry ingredients while stirring to incorporate. Mix the batter until smooth and free of lumps for a consistent texture.
- Transfer to Baking Pan: Pour the batter into the prepared baking tin. Gently tap the pan against your workspace to release any trapped air bubbles, ensuring an even bake.
- Bake the Mochi: Place the pan in the preheated oven and bake for 55 to 60 minutes. The top should turn golden brown. If the top browns too quickly before the mochi is fully cooked, cover it loosely with aluminum foil to prevent burning.
- Cool and Slice: Remove the mochi from the oven and let it cool completely in the baking tin. Once cooled, slice into 12 pieces, each approximately 8 cm x 5 cm (3.15 inches x 1.97 inches), and serve.
Notes
- If the top of the mochi browns faster than the center cooks, cover loosely with aluminum foil to prevent burning.
- Allow the mochi to cool completely before slicing to ensure clean cuts and the right texture.
- Use room temperature ingredients for better mixing and consistency.
- Prep Time: 10 minutes
- Cook Time: 55 minutes
- Category: Dessert
- Method: Baking
- Cuisine: Filipino