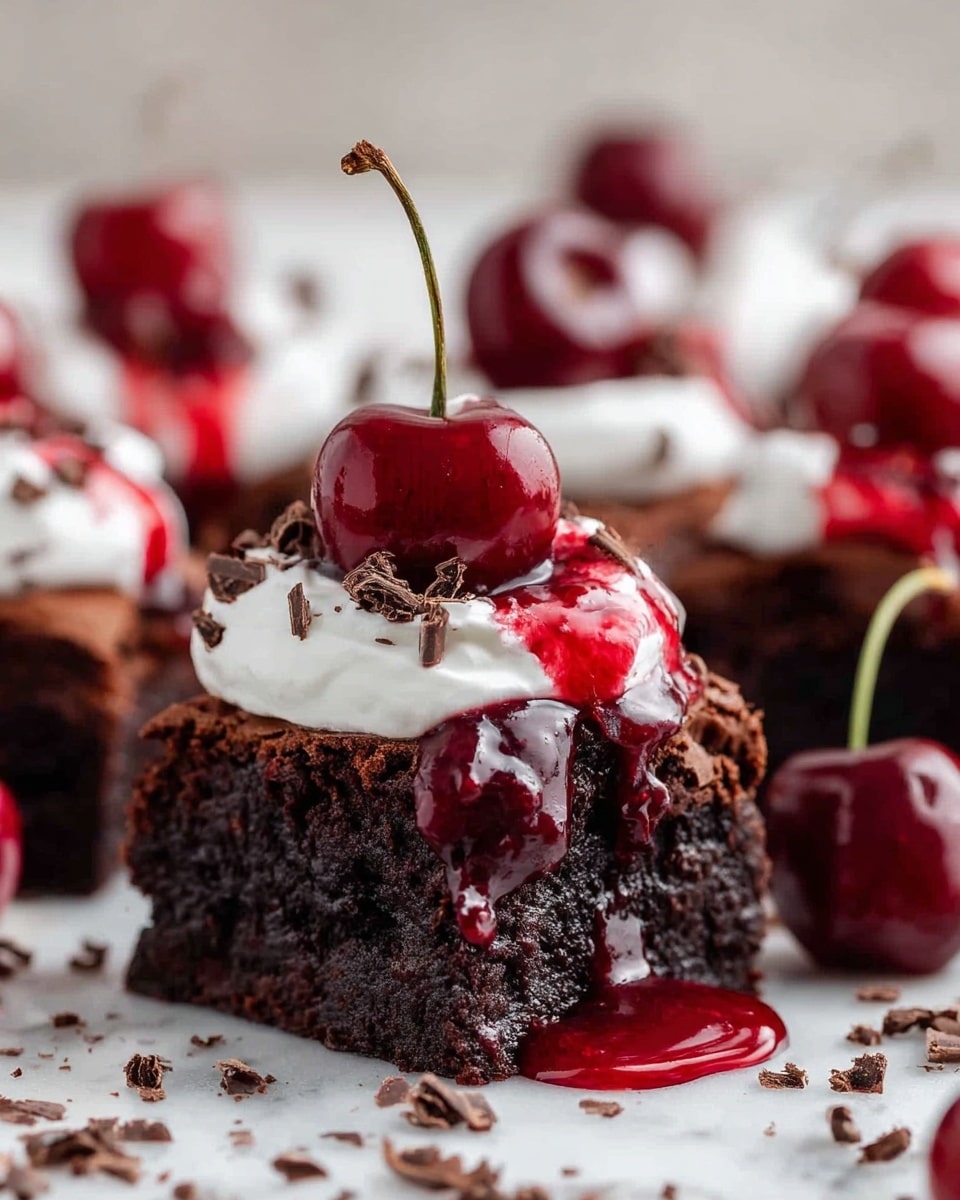
If you’re ready to dive into a dessert that combines the rich, fudgy delight of brownies with the sweet tartness of cherries, you’re in for a real treat. This Simple Black Forest Brownies Recipe takes the classic flavors of a Black Forest cake and blends them into a luscious, easy-to-make brownie that’s perfect for any occasion. Think moist chocolate, bursts of juicy cherries, and a silky whipped topping that come together in a mouthwatering harmony. Whether you’re baking for a party, a family gathering, or just because you deserve something special, this recipe is a guaranteed crowd-pleaser that’s surprisingly straightforward to whip up.
Ingredients You’ll Need
Gathering ingredients for this Simple Black Forest Brownies Recipe is wonderfully simple, but each component is essential to creating the signature balance of flavors and textures. From fudgy brownie base to vibrant cherry sauce and creamy topping, every ingredient plays an important role.
- 1 (18-ounce) box fudge brownie mix: The base of our dessert, ensuring a rich, chocolaty foundation with minimal fuss.
- Eggs, oil, and water: These typical brownie mix add-ins provide structure, moisture, and tenderness.
- 1 cup cherries (halved, fresh or frozen): Added right into the batter, these cherries bring bursts of juicy flavor and a hint of tartness.
- 3 ounces semi-sweet chocolate (roughly chopped): Melts into the batter for extra gooey chocolatey goodness.
- 1 1/2 cups cherries (fresh or frozen): For the luscious cherry sauce that defines the Black Forest twist.
- 1/4 cup granulated sugar: Sweetens the cherry sauce, balancing tartness perfectly.
- 1/4 teaspoon almond extract (optional): Adds a subtle, authentic note that enhances the cherry flavor beautifully.
- 1 tablespoon water: Helps thicken the cherry sauce when combined with cornstarch.
- 1/2 tablespoon cornstarch: A thickening agent to perfectly set the cherry topping.
- 1 cup whipped topping (Cool Whip): Offers a light, creamy layer that contrasts the dense brownie and tangy cherries.
- 1 ounce semi-sweet chocolate (finely chopped): For sprinkling on top, adding a touch of extra chocolate crunch and visual appeal.
How to Make Simple Black Forest Brownies Recipe
Step 1: Prepare Your Pan and Batter
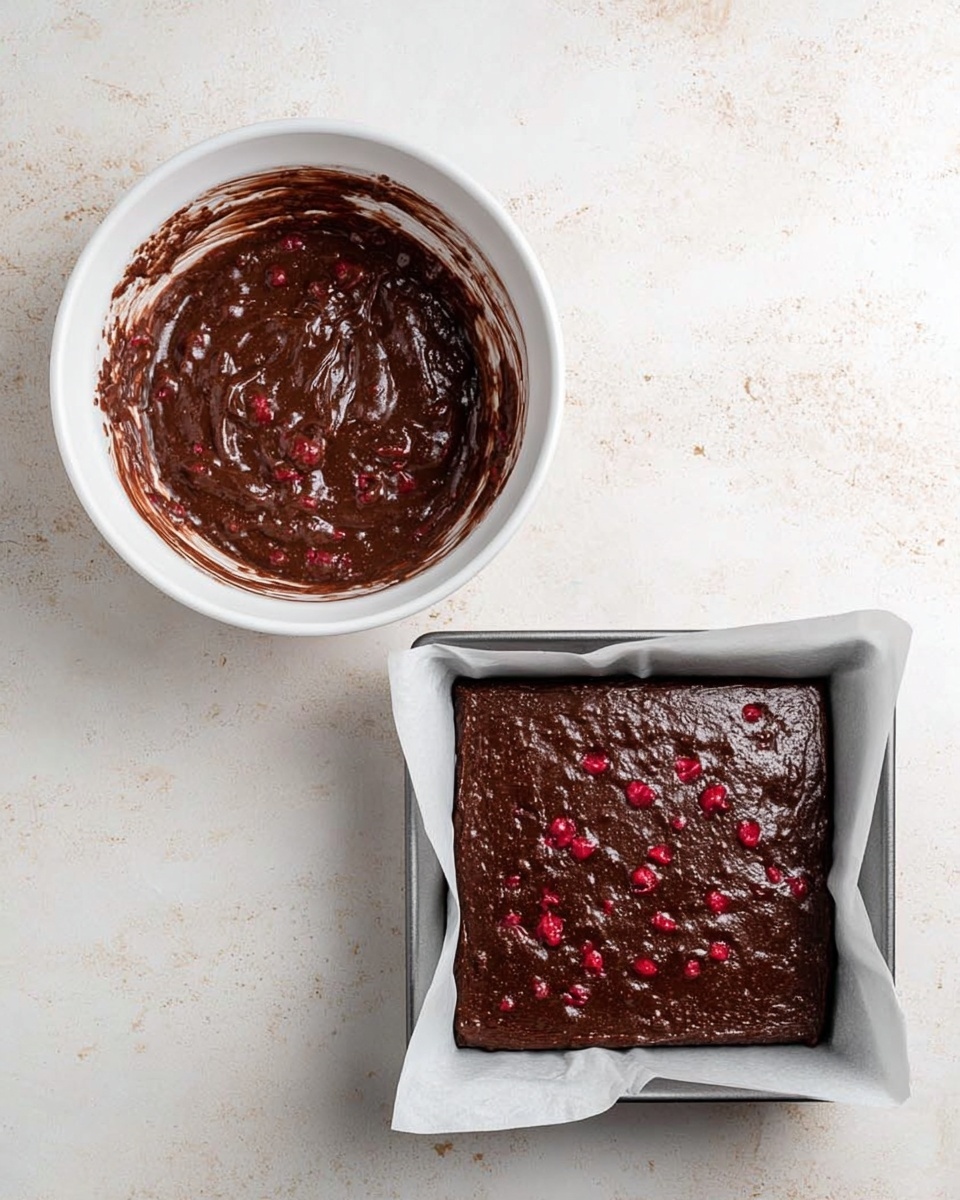
Start by preheating your oven exactly as the brownie mix instructions suggest. Line a 9×9-inch pan with parchment paper for an effortless release after baking and easy cleanup. Then, follow the box directions to prepare the brownie batter, but here’s the fun twist: stir in those halved cherries and the roughly chopped semi-sweet chocolate. This elevates your brownies with bursts of fruitiness and molten chocolate chunks that make every bite special.
Step 2: Bake to Perfection
Pour your cherry-studded batter into the prepared pan, smoothing it evenly. Bake according to the package’s recommended time, which usually takes around 20-25 minutes. The aroma itself will have you eager to cool and decorate. Once done, it is crucial to let the brownies cool completely to ensure your toppings sit perfectly on the surface without melting or sliding off.
Step 3: Create the Cherry Sauce
While the brownies cool, it’s time to make the signature cherry sauce. In a saucepan, combine 1 1/2 cups of cherries with sugar and a dash of almond extract if you choose to use it. Cook this mixture over medium heat, stirring frequently and mashing a few cherries to release their juices. This step builds a luscious, sweet, and slightly tangy fruit topping that embodies the heart of the Black Forest flavor.
Step 4: Thicken the Cherry Sauce
In a small bowl, whisk together water and cornstarch until smooth. Stir this into your warm cherry mixture and cook for an additional 1 to 2 minutes. The sauce will thicken up nicely, turning glossy and perfect for layering. Remove from heat and allow to cool; the sauce will firm up as it rests, making it just right to spread over your brownies.
Step 5: Assemble Your Black Forest Brownies
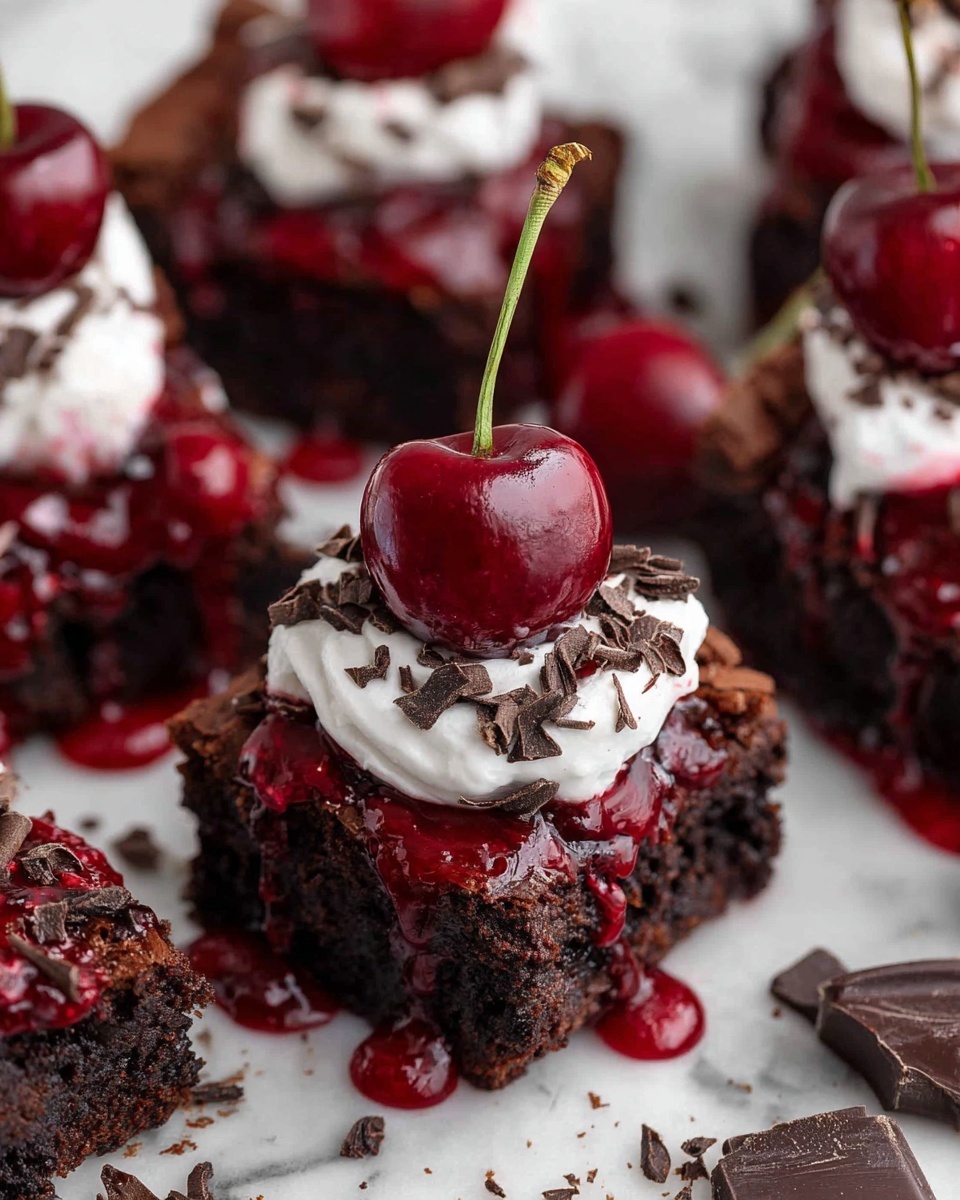
Spread about three-quarters of the cherry sauce evenly over the cooled brownies. Next, smooth the whipped topping on top, offering a fluffy and creamy contrast. Finally, drizzle the remaining cherry sauce over the whipped layer and scatter the finely chopped semi-sweet chocolate for that irresistible finishing touch. This layered look not only tastes divine but also looks stunning.
How to Serve Simple Black Forest Brownies Recipe
Garnishes
Adding a few fresh cherries on top or a sprinkle of powdered sugar can elevate your presentation with minimal effort. For a little extra flair, try a hint of shaved dark chocolate or a few toasted almonds for crunch and variety.
Side Dishes
Serve these brownies alongside a scoop of vanilla ice cream or a dollop of fresh whipped cream to complement the richness and add a cool, creamy note. A cup of strong coffee or a refreshing cold milk pairs beautifully, balancing the sweetness in every bite.
Creative Ways to Present
For a crowd or special occasion, consider serving these brownies in individual clear cups topped with whipped topping, cherry sauce, and a chocolate piece. This not only looks elegant but makes serving and portion control a breeze. You can even sandwich the brownies between layers of whipped cream and cherry sauce for a decadent treat that looks like a Black Forest brownie cake!
Make Ahead and Storage
Storing Leftovers
Keep your leftover Simple Black Forest Brownies Recipe covered in the refrigerator to maintain their freshness. Stored in an airtight container, they stay moist and delicious for up to 3-4 days. The cherry sauce and whipped topping keep the brownies moist and flavorful, so you won’t want to let them hang around too long!
Freezing
If you want to extend their life, you can freeze the brownies before adding the whipped topping and cherry sauce. Wrap them tightly in plastic wrap and foil to avoid freezer burn. Frozen brownies can last up to 2 months; just thaw them overnight in the fridge before assembling the toppings.
Reheating
When ready to enjoy, warming a brownie slightly in the microwave for about 15 seconds can bring back that fresh-baked feel. Add your chilled toppings after reheating for the best texture and taste experience.
FAQs
Can I use fresh cherries instead of frozen for this recipe?
Absolutely! Fresh cherries work wonderfully in this recipe and provide a vibrant, fresh flavor. Just be sure to pit and halve them before use. Frozen cherries are a great alternative when fresh aren’t in season and can be used directly after thawing.
Is the almond extract necessary?
The almond extract is optional but highly recommended. It adds depth and a subtle, authentic flavor that pairs perfectly with cherries and chocolate. If you don’t have it, you can skip it without compromising the overall taste.
Can I make these brownies gluten-free?
You can if you substitute the boxed brownie mix with a gluten-free version. Just make sure the chocolate and other ingredients you use are also gluten-free to keep the dish safe for those with gluten sensitivities.
How do I know when the brownies are done baking?
Follow the package instructions for baking time, but check by inserting a toothpick near the center. It should come out with a few moist crumbs but no raw batter. The brownies will continue to set as they cool, giving you that fudgy texture we’re aiming for.
Can I prepare this recipe ahead of time for a party?
Yes! These brownies can be made a day in advance. Bake, cool, and store the brownies without toppings, then add the cherry sauce and whipped topping just before serving to keep everything fresh and visually appealing.
Final Thoughts
There’s something undeniably magic about this Simple Black Forest Brownies Recipe that makes it feel like a special occasion in every bite. The blend of chocolate and cherries, the perfect balance of textures, and the ease of preparation come together in a way that’s sure to delight you and anyone lucky enough to taste it. Give this recipe a try, and I promise it’ll become one of your go-to desserts to share and savor again and again.
Print
Simple Black Forest Brownies Recipe
- Total Time: 45 minutes
- Yield: 16 servings
Description
These Simple Black Forest Brownies combine rich, fudgy brownie base mixed with juicy cherries and chunks of semi-sweet chocolate, topped with a luscious cherry sauce and whipped cream for a decadent twist on a classic dessert.
Ingredients
Brownie Batter
- 1 (18-ounce) box fudge brownie mix
- Ingredients required on the box (typically eggs, oil, and water)
- 1 cup cherries, halved (fresh or frozen)
- 3 ounces semi-sweet chocolate, roughly chopped
Cherry Sauce
- 1 1/2 cups cherries (fresh or frozen)
- 1/4 cup granulated sugar
- 1/4 teaspoon almond extract (optional)
- 1 tablespoon water
- 1/2 tablespoon cornstarch
Topping
- 1 cup whipped topping (Cool Whip)
- 1 ounce semi-sweet chocolate, finely chopped
Instructions
- Preheat Oven and Prepare Pan: Preheat your oven according to the instructions on the brownie mix package. Line a 9×9-inch baking pan with parchment paper to prevent sticking and ensure easy removal of the brownies.
- Make Brownie Batter: Prepare the brownie batter following the box directions. Gently fold in the halved cherries and roughly chopped semi-sweet chocolate pieces to add fruity and chocolatey chunks in every bite.
- Bake Brownies: Pour the batter into the prepared pan and bake as instructed on the box. Once baked, remove from oven and allow the brownies to cool completely before proceeding to the next steps.
- Prepare Cherry Sauce: In a medium saucepan over medium heat, combine 1 1/2 cups of cherries, granulated sugar, and almond extract if using. Cook for 6 to 8 minutes, stirring frequently and breaking up some cherries with a spoon to create a chunky sauce.
- Thicken Sauce: In a small bowl, mix together the water and cornstarch until smooth. Stir this mixture into the cherry sauce and cook for another 1 to 2 minutes until the sauce thickens. Remove from heat and let the sauce cool; it will continue to thicken as it cools.
- Assemble Brownies: Spoon about three-quarters of the cooled cherry sauce evenly over the cooled brownie base. Spread the whipped topping evenly over the cherry layer. Finally, drizzle the remaining cherry sauce on top and sprinkle with finely chopped semi-sweet chocolate for garnish and extra chocolate flavor.
Notes
- Use fresh cherries when in season for the best flavor, or frozen cherries that have been thawed and drained to avoid excess moisture.
- Almond extract is optional but adds a lovely depth to the cherry sauce enhancing the Black Forest taste.
- Allow the brownies to cool completely before adding the cherry sauce and whipped topping to prevent melting and sogginess.
- For a richer texture, use homemade whipped cream instead of Cool Whip.
- Store leftovers covered in the refrigerator for up to 3 days.
- Prep Time: 15 minutes
- Cook Time: 30 minutes
- Category: Dessert
- Method: Baking
- Cuisine: American


