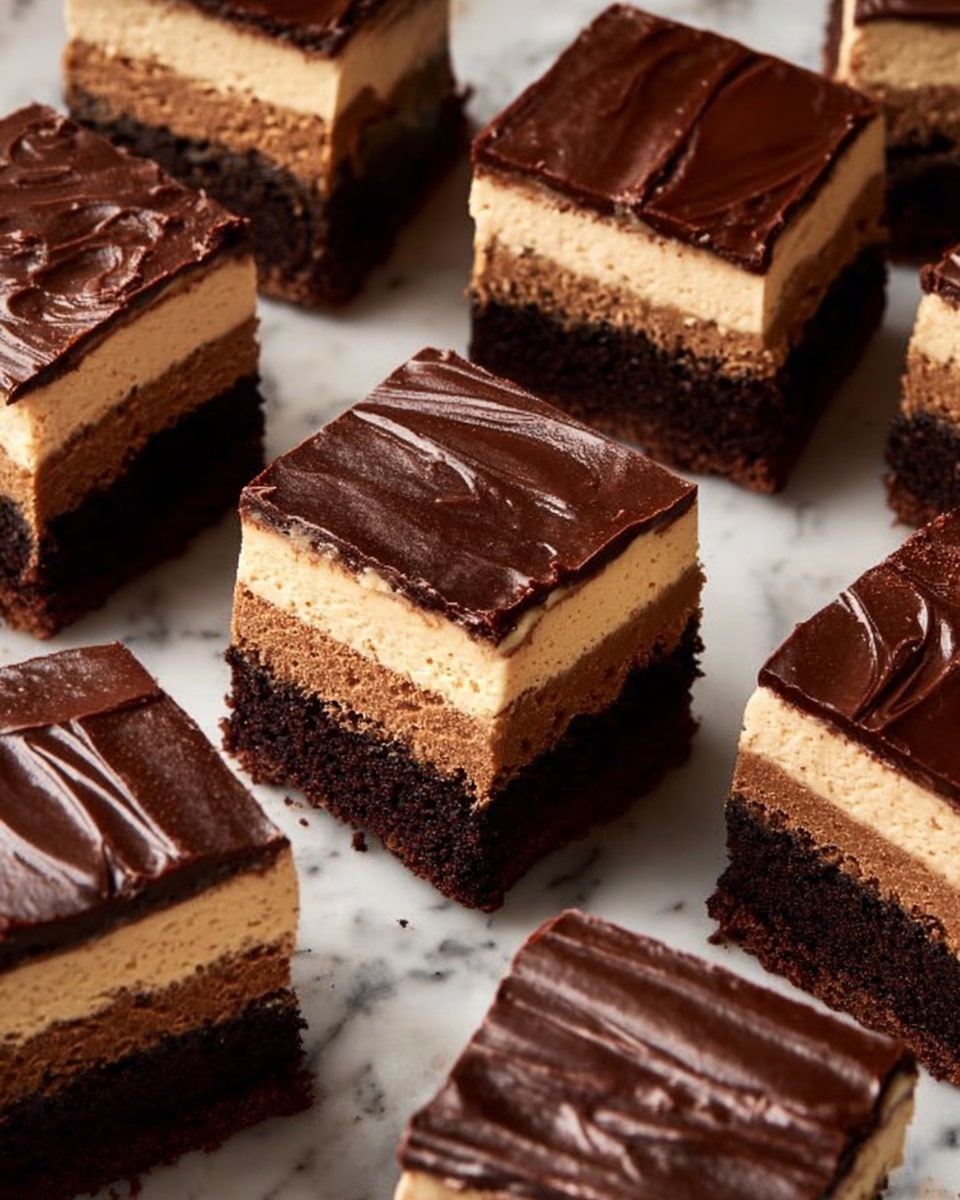
If you’re craving a rich, indulgent treat that combines the fudgy goodness of brownies with the irresistible flavors of peanut butter and chocolate, then you have to try this Tasty Buckeye Brownies Recipe. It’s the perfect blend of soft, gooey brownie base topped with a creamy, sweet peanut butter layer and finished with a luscious chocolate coating. Each bite is a little bite of heaven, capturing that classic Buckeye candy inspiration in an easy, crowd-pleasing dessert.
Ingredients You’ll Need
This recipe keeps things straightforward with essential ingredients that each play a critical role in creating the perfect texture and flavor balance. From the fudgy brownie base to the creamy peanut butter and smooth chocolate, every component contributes to an unforgettable dessert experience.
- Fudge brownie mix: The foundation for a rich, moist brownie that saves time without sacrificing flavor.
- Eggs: Provide structure and moisture to the brownie batter, ensuring it bakes up perfectly.
- Butter: Used in two parts—one half for the brownies and the other for the peanut butter and chocolate layers, adding richness and smoothness.
- Creamy peanut butter: Brings that signature nutty flavor and creamy texture for the middle layer.
- Confectioners’ sugar: Sweetens and thickens the peanut butter layer to the perfect spreading consistency.
- Semisweet or dark chocolate chips: Melts into a glossy, deep chocolate topping that balances the sweetness of the peanut butter.
How to Make Tasty Buckeye Brownies Recipe
Step 1: Prepare the Brownie Base
Start by preheating your oven and mixing the fudge brownie batter as instructed on the package. Pour the batter into a greased 8×8-inch pan for extra-thick brownies or use the size recommended on your mix. Bake according to the directions until the brownies are set but still moist inside. Allow them to cool completely right in the pan—this cooling step is essential before adding the layers on top.
Step 2: Make the Peanut Butter Layer
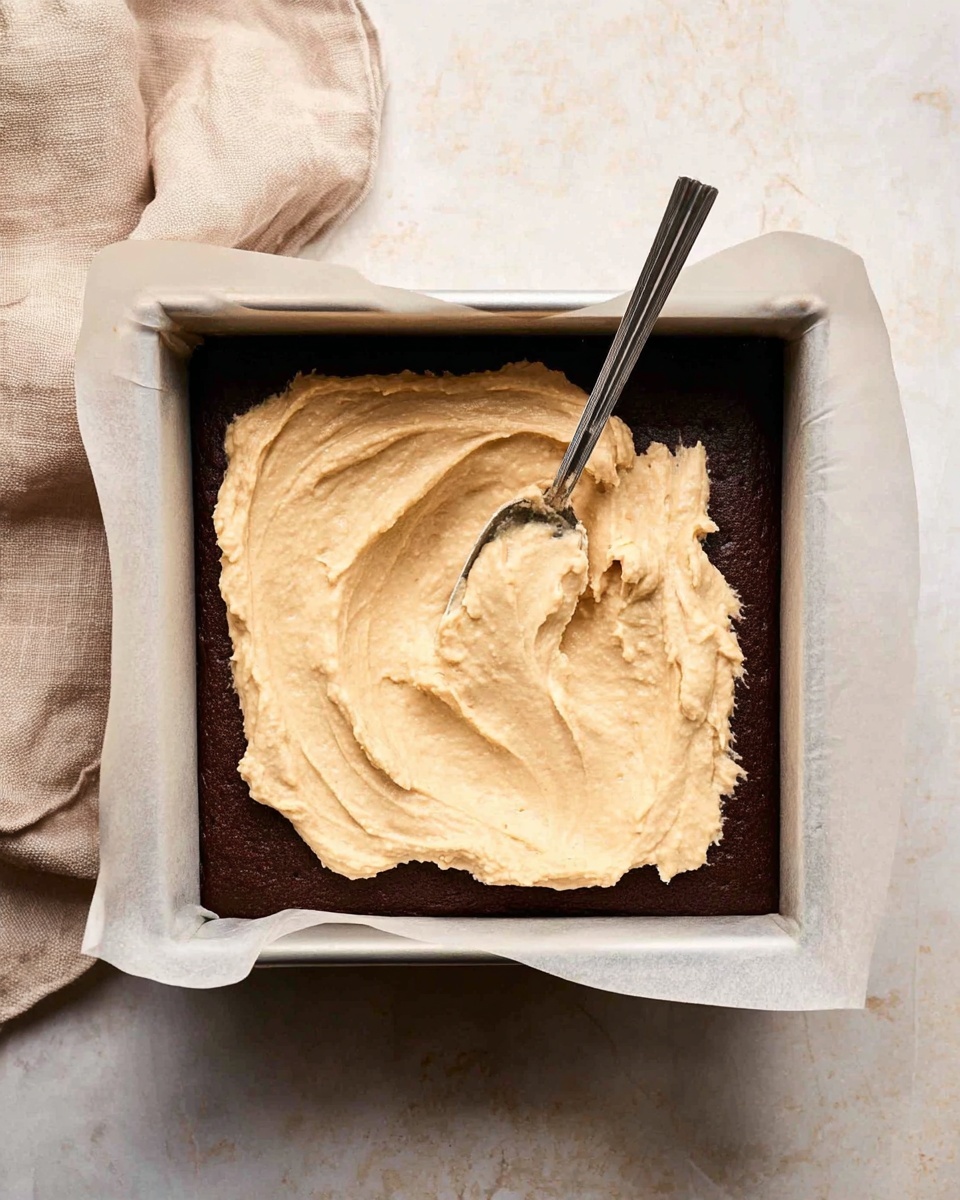
In a microwave-safe bowl, melt ½ cup of butter together with the peanut butter by heating for 30 to 60 seconds until smooth. Stir in the confectioners’ sugar gradually until the mixture turns thick and spreadable. This combination gives your Buckeye brownies that silky, sweet peanut butter flavor that you’ll swoon over. Evenly spread this layer on top of the cooled brownies for a creamy contrast to the fudgy base.
Step 3: Create the Chocolate Topping
Next, melt 6 tablespoons of butter together with the chocolate chips in a microwave-safe bowl. Microwave in 30-second bursts, stirring in between, until the chocolate is fully melted and smooth. Pour this luscious chocolate over the peanut butter layer and gently smooth it out to cover evenly. This final touch brings everything together with a glossy chocolate shine that looks as good as it tastes.
Step 4: Chill and Slice
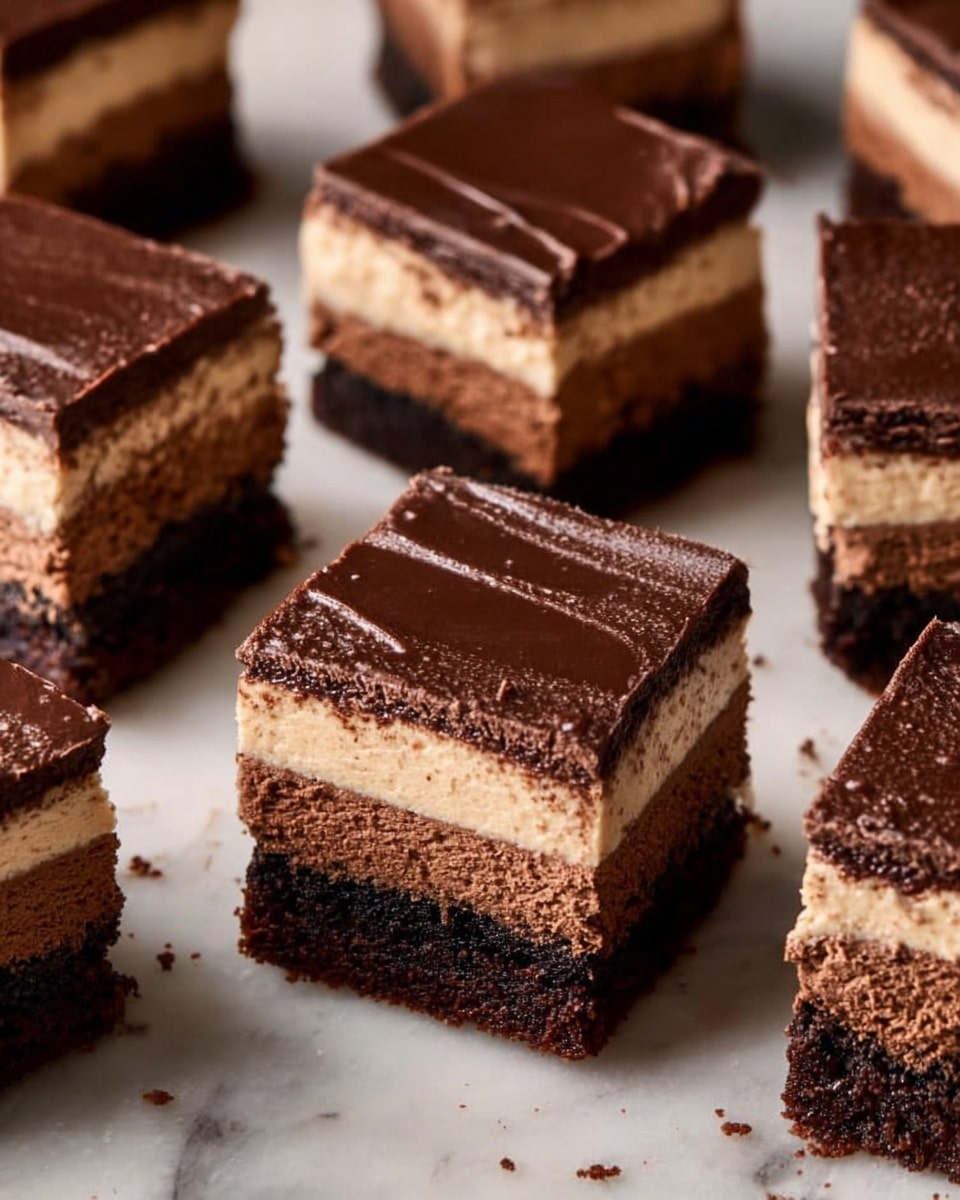
Place the brownies in the refrigerator for 30 to 60 minutes, or until the chocolate layer has set firmly. This chilling step helps the layers hold their shape when sliced. Once set, cut into squares and get ready to enjoy the perfect bite of peanut butter and chocolate bliss.
How to Serve Tasty Buckeye Brownies Recipe
Garnishes
For an even more inviting presentation, consider sprinkling a pinch of flaky sea salt or chopped roasted peanuts on top of the chocolate before it sets. These garnishes add a delightful crunch and enhance the peanut butter flavor. You can also add a light dusting of cocoa powder or drizzle some melted white chocolate for a pretty contrast.
Side Dishes
Tasty Buckeye Brownies Recipe pairs wonderfully with simple sides like a scoop of vanilla ice cream, a dollop of whipped cream, or a drizzle of caramel sauce. Fresh berries or sliced bananas also provide a refreshing balance to the richness if you want a bit of fruity brightness alongside your sweet treat.
Creative Ways to Present
For parties or special occasions, arrange your brownies on a wooden serving board layered with parchment paper to create an inviting rustic look. You could also sandwich the brownies with ice cream to make decadent brownie ice cream sandwiches. Another fun twist is cutting the brownies into bite-sized squares and serving them on cupcake liners for easy grab-and-go snacking.
Make Ahead and Storage
Storing Leftovers
Keep your leftover Tasty Buckeye Brownies Recipe in an airtight container at room temperature for up to two days. If your kitchen is warm, storing them in the refrigerator is fine and will help the chocolate topping stay firm. Just be sure to let them come to room temperature before serving so they are soft and fudgy again.
Freezing
You can freeze these brownies for longer storage by wrapping them tightly in plastic wrap and then placing them in a freezer-safe container or zip-top bag. They’ll keep well for up to three months. When you’re ready to indulge, thaw them overnight in the fridge for best texture and taste.
Reheating
To bring back that freshly baked warmth, microwave a single brownie square for about 10 to 15 seconds. Avoid overheating so the chocolate doesn’t melt too much. Serving them slightly warm enhances their fudginess and melts the peanut butter layer just a bit for gooey perfection.
FAQs
Can I use homemade brownie batter instead of a mix?
Absolutely! Homemade brownie batter can work wonderfully and will give you more control over the ingredients. Just be sure your brownie base is thick and fudgy enough to support the peanut butter and chocolate layers for the best texture.
Is it possible to substitute natural peanut butter?
You can use natural peanut butter, but since it’s usually thinner and less sweet than creamy peanut butter, you might need to adjust the amount of confectioners’ sugar to maintain the thick spreadable texture for the peanut butter layer.
What if I don’t have a microwave to melt the butter and chocolate?
No worries! You can melt the butter and chocolate on the stovetop using a double boiler or a heatproof bowl set over simmering water. Stir constantly until everything is melted and smooth.
Can I make these brownies vegan?
With some ingredient swaps like using vegan butter, egg replacers, dairy-free chocolate chips, and peanut butter without added dairy, you can make a vegan version. Just ensure the fudge brownie mix you choose is also vegan-friendly.
How thick should the peanut butter layer be?
Aim for a peanut butter layer about a quarter-inch thick; thick enough to stand up to the chocolate without mixing but thin enough to slice easily. It’s this balance that makes the Tasty Buckeye Brownies Recipe irresistible and easy to enjoy.
Final Thoughts
If you’re looking to wow your family and friends with a dessert that’s equal parts nostalgic and decadent, do yourself a favor and dive into this Tasty Buckeye Brownies Recipe. It’s simple enough for busy weeknights but special enough for celebrations. Trust me, once you taste these chewy, creamy, chocolatey layers, they’ll quickly become your favorite go-to treat!
Print
Tasty Buckeye Brownies Recipe
- Total Time: 1 hour 15 minutes
- Yield: 16 brownies
Description
Tasty Buckeye Brownies are a decadent treat combining rich fudge brownies with a creamy peanut butter layer and a smooth chocolate topping. This layered dessert is perfect for peanut butter and chocolate lovers seeking an indulgent and easy-to-make sweet. The brownies are baked until fudgy, topped with a buttery peanut butter frosting, and finished with a glossy chocolate ganache.
Ingredients
Brownie Layer
- 1 package fudge brownie mix
- 3 eggs
- ½ cup butter
Peanut Butter Frosting
- ½ cup butter
- 1 cup creamy peanut butter
- 2 cups confectioners’ sugar
Chocolate Topping
- 6 tablespoons butter
- 6 ounces semisweet or dark chocolate chips
Instructions
- Prepare Brownie Batter: Preheat your oven to the temperature specified on the brownie mix package. Prepare the brownie batter following the package directions, mixing the brownie mix, eggs, and ½ cup butter until smooth.
- Bake Brownies: Grease an 8×8-inch baking pan for extra-thick brownies or use the pan size recommended on the package. Pour in the batter evenly and bake as directed on the package. Once baked, remove from oven and allow the brownies to cool completely in the pan.
- Make Peanut Butter Frosting: In a microwave-safe bowl, combine ½ cup butter and 1 cup creamy peanut butter. Microwave for 30 to 60 seconds until the butter is melted. Stir in 2 cups confectioners’ sugar until the mixture becomes smooth and thick.
- Spread Frosting: Evenly spread the peanut butter frosting over the cooled brownies, creating a smooth layer.
- Melt Chocolate Topping: In a separate microwave-safe bowl, combine 6 tablespoons butter and 6 ounces semisweet or dark chocolate chips. Microwave in 30-second intervals, stirring between each, until the chocolate and butter melt completely and form a smooth ganache.
- Top Brownies with Chocolate: Pour the melted chocolate mixture over the peanut butter layer and gently spread it into an even layer using a spatula.
- Set and Serve: Refrigerate the brownies for 30 to 60 minutes until the chocolate topping is set. Once firm, slice into squares and serve.
Notes
- Using an 8×8-inch pan results in thicker brownies, but you can use a larger pan if preferred for thinner brownies.
- Ensure the brownies are completely cooled before spreading the peanut butter frosting to prevent it from melting.
- Microwave times may vary; melt the butter and chocolate slowly to avoid burning.
- For a nut-free version, substitute peanut butter with sunflower seed butter.
- Prep Time: 15 minutes
- Cook Time: 30 minutes
- Category: Dessert
- Method: Baking
- Cuisine: American


