Why You’ll Love This Recipe
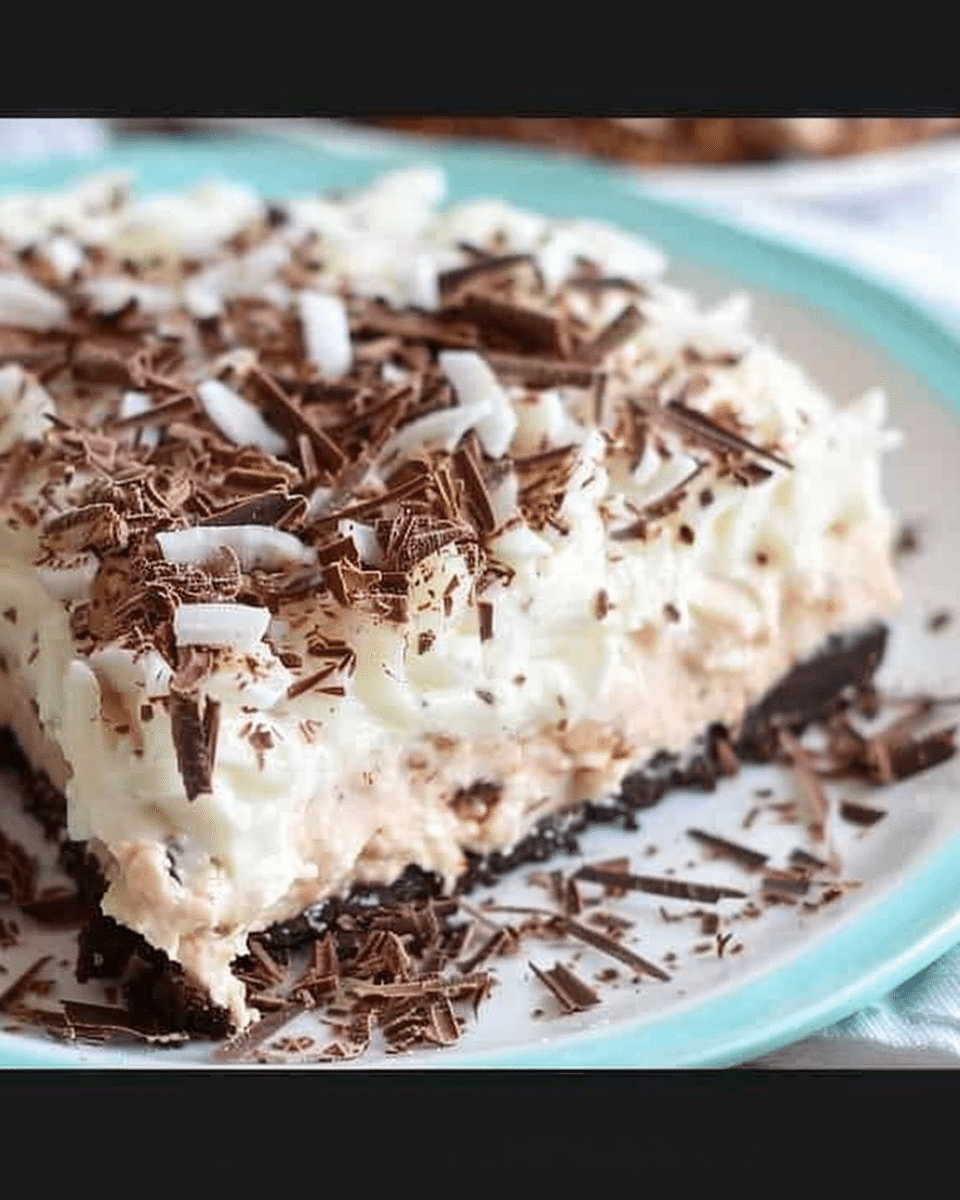
This Dairy-Free Chocolate Coconut Cream Pie is a showstopper, blending the deep flavor of chocolate with the light sweetness of coconut. The pie is made with coconut milk to create a creamy, dairy-free filling that’s just as rich and luscious as any traditional version. The combination of flavors and textures makes each bite a satisfying experience, and the flaky, homemade crust adds the perfect balance to the creamy filling.
Not only is this pie indulgent, but it’s also versatile—perfect for anyone with lactose intolerance, dairy allergies, or those following a vegan or plant-based diet. It’s so delicious that even non-dairy eaters will love it!
Ingredients
-
For the Crust:
-
1 ½ cups graham cracker crumbs (or gluten-free crumbs for a GF version)
-
¼ cup coconut oil (melted)
-
2 tablespoons maple syrup (or agave for a vegan option)
-
Pinch of salt
-
-
For the Chocolate Coconut Filling:
-
1 can (14 oz) full-fat coconut milk
-
½ cup canned coconut cream
-
1/2 cup dairy-free chocolate chips (or chopped dairy-free chocolate)
-
¼ cup sugar (coconut sugar works well for a refined sugar-free option)
-
2 tablespoons cornstarch (for thickening)
-
1 teaspoon vanilla extract
-
1/2 cup shredded unsweetened coconut (plus extra for garnish)
-
Pinch of salt
-
-
For the Coconut Whipped Cream Topping:
-
1 can (14 oz) full-fat coconut milk (chilled overnight)
-
2 tablespoons powdered sugar (optional)
-
1 teaspoon vanilla extract
-
(Tip: You’ll find the full list of ingredients and measurements in the recipe card below.)
Directions
1. Prepare the Crust:
-
Preheat the oven to 350°F (175°C).
-
In a medium bowl, mix the graham cracker crumbs, melted coconut oil, maple syrup, and a pinch of salt. Stir until the mixture is evenly combined.
-
Press the crumb mixture into the bottom and sides of a 9-inch pie pan. Use the back of a spoon to press it firmly.
-
Bake the crust in the preheated oven for 8-10 minutes or until it is lightly golden. Let it cool completely before filling.
2. Make the Chocolate Coconut Filling:
-
In a medium saucepan, combine the coconut milk, coconut cream, sugar, and salt. Heat over medium heat, stirring occasionally, until it just begins to simmer.
-
In a separate small bowl, mix the cornstarch with 2 tablespoons of cold water to form a slurry.
-
Slowly pour the cornstarch mixture into the simmering coconut milk, whisking constantly to avoid lumps. Continue to cook, whisking frequently, until the mixture thickens (about 5-7 minutes).
-
Remove from heat and stir in the vanilla extract and shredded coconut.
-
Add the dairy-free chocolate chips and stir until fully melted and incorporated into the mixture.
-
Pour the chocolate coconut filling into the cooled pie crust, smoothing it out with a spatula. Let it set in the refrigerator for at least 4 hours, or overnight for best results.
3. Make the Coconut Whipped Cream:
-
After chilling the coconut milk overnight, open the can and scoop out the solidified coconut cream (discarding any liquid).
-
Using a hand mixer or stand mixer, beat the coconut cream with the powdered sugar and vanilla extract until light and fluffy, about 2-3 minutes.
-
Spoon the whipped coconut cream onto the chilled chocolate coconut pie.
4. Garnish and Serve:
-
Top the pie with shredded coconut and any additional toppings you like.
-
Slice and serve chilled for the best texture and flavor.
Servings and Timing
-
Servings: This pie serves 8-10 people, depending on portion size.
-
Prep Time: 20 minutes (not including cooling and setting time)
-
Cook Time: 15 minutes (for the crust and filling)
-
Refrigeration Time: 4 hours (for the pie to set)
Variations
-
Chocolate Crust: If you love chocolate, try making a chocolate crust using chocolate graham crackers or adding cocoa powder to the crust mixture.
-
Fruit Toppings: Top the pie with fresh berries, such as raspberries or strawberries, to add a fresh, tart contrast to the creamy filling.
-
Nutty Flavor: Add chopped toasted almonds or pecans on top of the coconut whipped cream for an extra layer of flavor and texture.
-
Vegan Option: Ensure all ingredients are vegan, such as using maple syrup instead of honey and checking that the chocolate is dairy-free.
Storage/Reheating
-
Storage: Store the pie in the refrigerator, covered, for up to 4-5 days. The filling and whipped coconut cream should remain fresh for this time frame.
-
Freezing: The pie can be frozen for longer storage. Cover it tightly with plastic wrap and foil, and freeze for up to 1 month. Let it thaw in the refrigerator before serving.
FAQs
1. Can I use a store-bought pie crust?
Yes, if you’re short on time, you can use a store-bought dairy-free pie crust. Just be sure to check the ingredients to ensure it’s dairy-free.
2. Can I make this pie gluten-free?
Yes, use gluten-free graham cracker crumbs or a gluten-free pie crust. The filling is naturally gluten-free, so just ensure your crust is suitable.
3. How can I make the coconut whipped cream thicker?
If the coconut whipped cream is too runny, chill the coconut cream for a longer period of time (overnight is best) and make sure you’re only using the solidified portion.
4. Can I use regular milk instead of coconut milk?
Since this is a dairy-free recipe, using regular milk is not recommended. If you’re not avoiding dairy, you can substitute regular milk and cream, but it will change the flavor and texture.
5. How do I store leftovers?
Store the leftover pie in an airtight container or cover the pie with plastic wrap in the refrigerator. It will stay fresh for 4-5 days.
6. Can I use a different sweetener in the filling?
Yes, you can use other sweeteners such as maple syrup, agave, or coconut sugar. Just be aware that different sweeteners may slightly change the flavor of the filling.
7. Is the coconut cream essential for the filling?
Yes, coconut cream helps to thicken the filling and gives it a creamy texture. If you can’t find coconut cream, you can use full-fat coconut milk, but the filling may be slightly less thick.
8. Can I make this pie ahead of time?
Yes, this pie is perfect for making ahead of time. Prepare it the day before and allow it to set in the refrigerator overnight for the best texture.
9. Can I use another nut-based cream for the topping?
Yes, you can use cashew cream or almond cream as an alternative to coconut whipped cream if you prefer. Just make sure it is thick and can hold its shape when whipped.
10. Can I make this pie without the whipped cream topping?
While the whipped coconut cream adds a nice lightness and texture, you can certainly skip it if you prefer a simpler version. The pie will still be delicious without it.
Conclusion
Dairy-Free Chocolate Coconut Cream Pie is a luxurious dessert that will satisfy your cravings for something creamy, chocolatey, and indulgent, all while being dairy-free. With a smooth, velvety chocolate filling, a flaky, buttery crust, and topped with fluffy coconut whipped cream, this pie is perfect for special occasions or a weekend treat. Whether you’re serving it to guests or enjoying it on your own, it’s sure to be a crowd-pleaser!
Dairy-Free Chocolate Coconut Cream Pie
5 Stars 4 Stars 3 Stars 2 Stars 1 Star
No reviews
- Author: Ava
- Total Time: 4 hours (for the pie to set)
- Yield: 8servings
- Diet: Gluten Free
Description
This Dairy-Free Chocolate Coconut Cream Pie is a rich, indulgent dessert combining the creamy richness of chocolate and coconut in a perfectly flaky, dairy-free pie. The filling is velvety and smooth, made with coconut milk and coconut cream, while the homemade graham cracker crust adds the perfect crunch. Perfect for those with dietary restrictions or anyone craving a rich, decadent treat!
Ingredients
For the Crust:
1 ½ cups graham cracker crumbs (or gluten-free crumbs for a GF version)
¼ cup coconut oil (melted)
2 tablespoons maple syrup (or agave for a vegan option)
Pinch of salt
For the Chocolate Coconut Filling:
1 can (14 oz) full-fat coconut milk
½ cup canned coconut cream
1/2 cup dairy-free chocolate chips (or chopped dairy-free chocolate)
¼ cup sugar (coconut sugar works well for a refined sugar-free option)
2 tablespoons cornstarch (for thickening)
1 teaspoon vanilla extract
1/2 cup shredded unsweetened coconut (plus extra for garnish)
Pinch of salt
For the Coconut Whipped Cream Topping:
1 can (14 oz) full-fat coconut milk (chilled overnight)
2 tablespoons powdered sugar (optional)
1 teaspoon vanilla extract
Instructions
-
Prepare the Crust:
-
Preheat the oven to 350°F (175°C).
-
In a medium bowl, mix the graham cracker crumbs, melted coconut oil, maple syrup, and a pinch of salt. Stir until the mixture is evenly combined.
-
Press the crumb mixture into the bottom and sides of a 9-inch pie pan. Use the back of a spoon to press it firmly.
-
Bake the crust in the preheated oven for 8-10 minutes or until it is lightly golden. Let it cool completely before filling.
-
-
Make the Chocolate Coconut Filling:
-
In a medium saucepan, combine the coconut milk, coconut cream, sugar, and salt. Heat over medium heat, stirring occasionally, until it just begins to simmer.
-
In a separate small bowl, mix the cornstarch with 2 tablespoons of cold water to form a slurry.
-
Slowly pour the cornstarch mixture into the simmering coconut milk, whisking constantly to avoid lumps. Continue to cook, whisking frequently, until the mixture thickens (about 5-7 minutes).
-
Remove from heat and stir in the vanilla extract and shredded coconut.
-
Add the dairy-free chocolate chips and stir until fully melted and incorporated into the mixture.
-
Pour the chocolate coconut filling into the cooled pie crust, smoothing it out with a spatula. Let it set in the refrigerator for at least 4 hours, or overnight for best results.
-
-
Make the Coconut Whipped Cream:
-
After chilling the coconut milk overnight, open the can and scoop out the solidified coconut cream (discarding any liquid).
-
Using a hand mixer or stand mixer, beat the coconut cream with the powdered sugar and vanilla extract until light and fluffy, about 2-3 minutes.
-
Spoon the whipped coconut cream onto the chilled chocolate coconut pie.
-
-
Garnish and Serve:
-
Top the pie with shredded coconut and any additional toppings you like.
-
Slice and serve chilled for the best texture and flavor.
-
Notes
-
Storage: Store the pie in the refrigerator, covered, for up to 4-5 days.
-
Freezing: The pie can be frozen for longer storage. Cover it tightly with plastic wrap and foil, and freeze for up to 1 month. Let it thaw in the refrigerator before serving.
- Prep Time: 15min
- Cook Time: 15min
- Category: Dessert
- Method: No-Bake
- Cuisine: American


